

When it comes to bathroom design, few materials offer the versatility, charm, and timeless appeal of bead board walls. This classic paneling system has been making a remarkable comeback in modern interiors, and for good reason. A bathroom with bead board walls doesn’t just look beautiful—it creates an atmosphere of warmth, character, and sophistication that’s difficult to achieve with other materials. The distinctive vertical lines and subtle shadow play of bead board add visual interest without overwhelming the space, making it perfect for bathrooms of all sizes. Beyond aesthetics, bead board walls offer practical benefits too. They’re durable, easy to clean, and can help protect your bathroom walls from moisture damage—a crucial consideration in humid environments. Whether you’re aiming for a coastal cottage feel, a farmhouse aesthetic, or a more contemporary look with traditional touches, bead board provides the perfect foundation. This article will explore three distinct approaches to incorporating bead board walls in your bathroom, showing you how this simple material can transform your space from ordinary to extraordinary. From installation tips to design considerations, we’ll cover everything you need to know to make bead board work beautifully in your bathroom.
Choosing the Perfect Bead Board Walls for Your Bathroom
Selecting the right bead board for your bathroom walls requires careful consideration of several factors. First, decide between traditional wood bead board and modern alternatives like PVC or MDF. Wood offers authentic warmth and can be painted any color, but requires more maintenance in humid bathroom environments. PVC and MDF options are moisture-resistant and often more affordable, though they may lack the natural texture of real wood. Consider the height of your bead board installation too. A classic approach features bead board covering the lower half of bathroom walls, typically 36 to 42 inches high, with a chair rail separating it from painted walls above. For a more dramatic effect, extend the bead board all the way to the ceiling. This creates a cohesive look and can make small bathrooms feel taller. The spacing between beads (called the bead profile) also matters. Narrow bead spacing creates a more traditional, detailed look, while wider spacing offers a cleaner, more contemporary feel. Don't forget about paint and finish options. Semi-gloss or satin finishes work best for bathroom walls as they're easy to clean and resist moisture better than flat paints. Popular color choices include crisp whites, soft grays, and pale blues that complement various bathroom fixtures and accessories. Before installation, ensure your bathroom walls are properly prepared—level, clean, and dry—for the best results with your bead board walls.
3 Creative Ways to Install Bead Board Walls in Your Bathroom
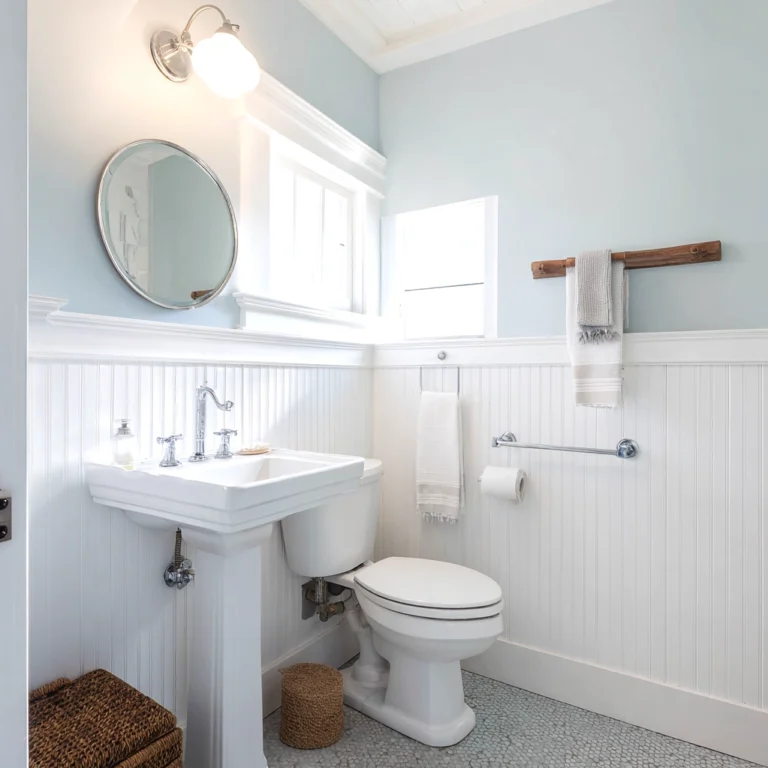
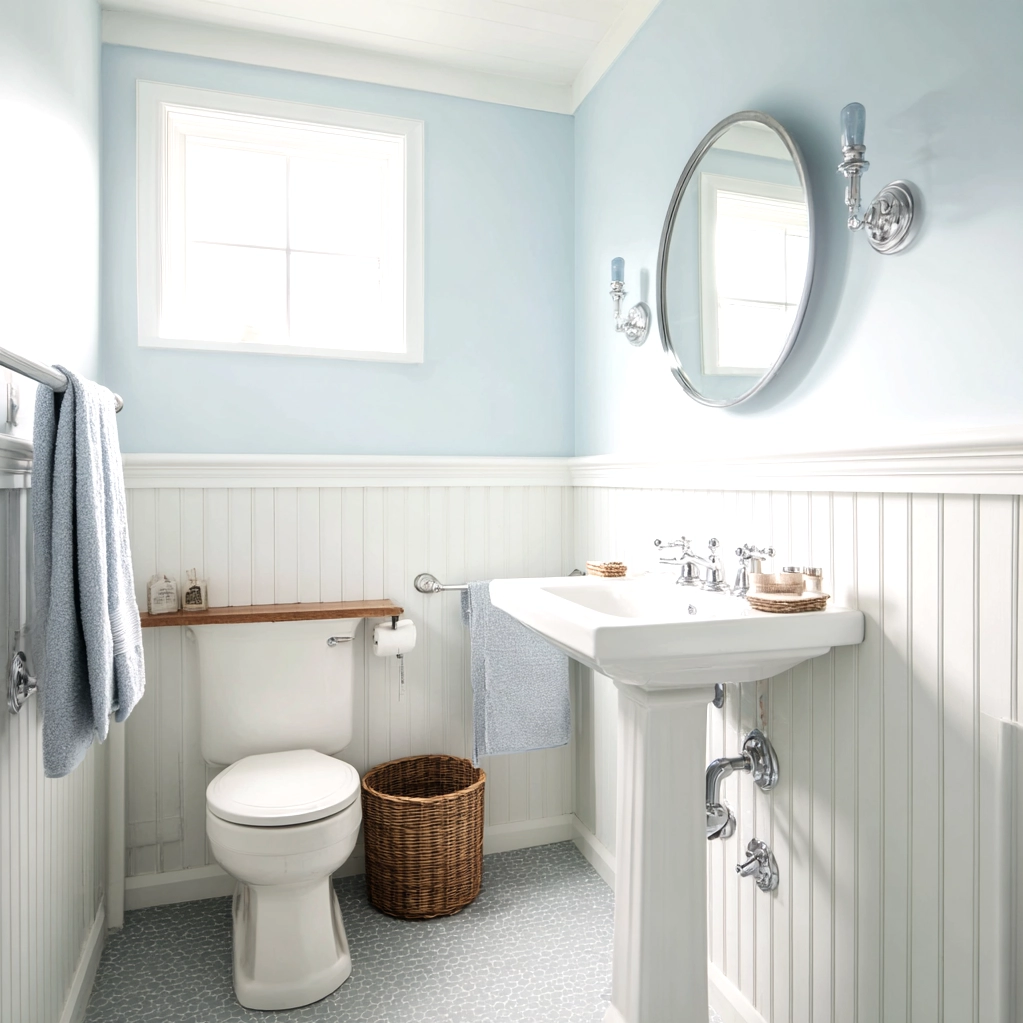
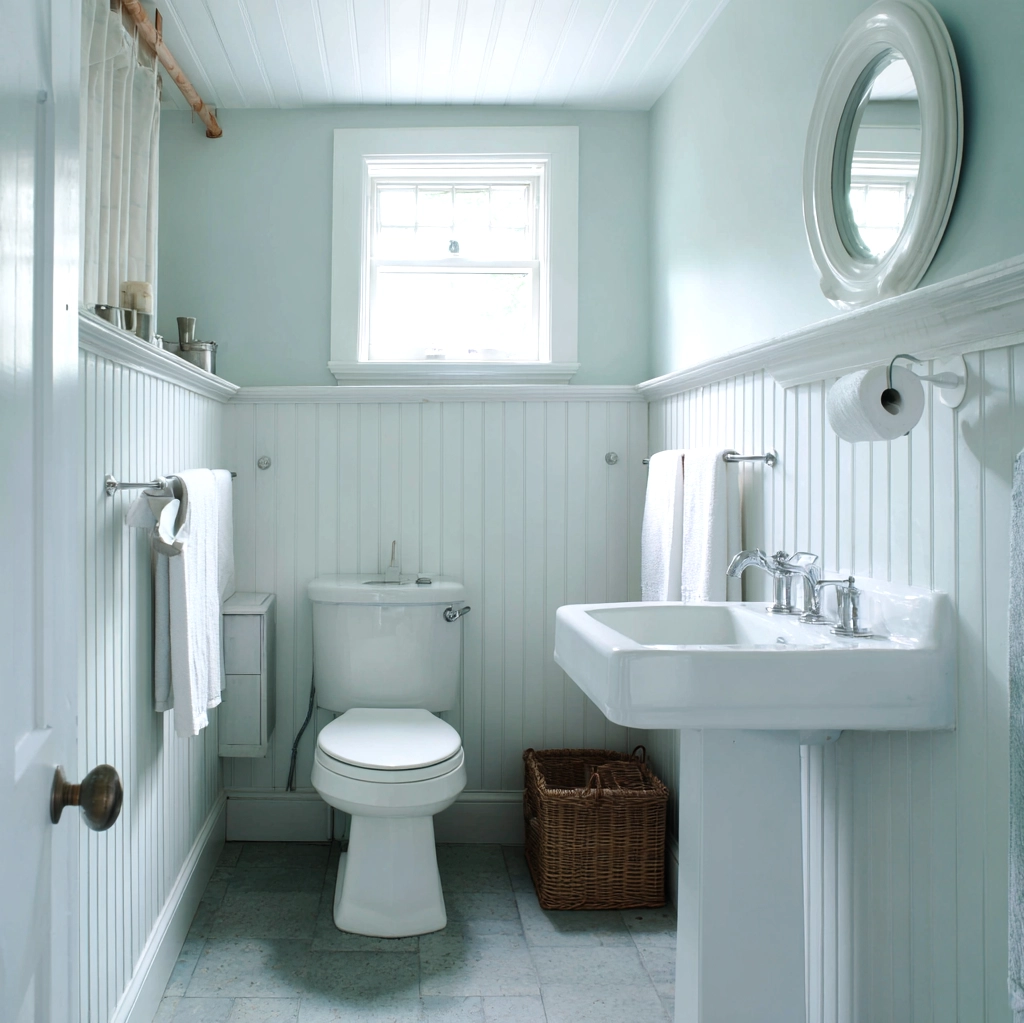
Transforming your bathroom with bead board walls offers numerous installation possibilities beyond basic wall coverage. The first approach involves creating a classic wainscoting effect by installing bead board on the lower portion of bathroom walls. This traditional method typically runs 36 to 42 inches high and includes a decorative chair rail cap. It's perfect for protecting walls from splashes while adding architectural interest. For a more modern twist, consider running bead board horizontally rather than vertically. This unexpected orientation creates visual width and can make narrow bathrooms appear more spacious. Horizontal installation works particularly well in contemporary or transitional bathroom designs. Another innovative approach involves using bead board as an accent wall behind your vanity or bathtub. This focal point installation draws attention to key bathroom features without overwhelming the entire space. You can enhance this look by painting the bead board a contrasting color or using it as a backdrop for floating shelves and decorative items. For those seeking maximum impact, install bead board from floor to ceiling throughout the bathroom. This creates a cohesive, enveloping effect that works beautifully in coastal or cottage-style bathrooms. Consider combining these approaches—perhaps bead board wainscoting on most walls with a full-height bead board accent wall behind the tub. Each installation method offers different visual effects and functional benefits, allowing you to customize your bathroom's look while enjoying the timeless appeal of bead board walls.

Maintaining and Enhancing Your Bead Board Walls Bathroom
Proper maintenance ensures your bead board walls bathroom remains beautiful for years to come. Regular cleaning with a soft cloth and mild soap solution keeps bead board looking fresh. Avoid abrasive cleaners that could damage the finish, especially on painted surfaces. In humid bathroom environments, proper ventilation is crucial. Use exhaust fans during and after showers to reduce moisture buildup that could affect your bead board walls over time. Address any water leaks or condensation issues promptly to prevent damage. For painted bead board, touch up chips or scratches as needed to maintain a flawless appearance. Beyond maintenance, consider how to enhance your bead board walls with complementary elements. The right accessories can elevate your bathroom's entire aesthetic. Choose hardware that complements your bead board's style—traditional bathrooms might feature ornate brass or nickel fixtures, while contemporary spaces could use sleek chrome or matte black. Lighting plays a crucial role too. Sconces mounted on bead board walls should be properly sealed to prevent moisture issues. Consider how natural and artificial light interacts with the vertical lines of your bead board, creating beautiful shadow patterns throughout the day. Storage solutions can integrate beautifully with bead board walls. Floating shelves or recessed niches maintain the clean lines while providing functional space. Finally, consider how other bathroom elements work with your bead board. A clawfoot tub, pedestal sink, or vintage-style fixtures can enhance the traditional charm, while modern fixtures create an interesting contrast. These thoughtful touches ensure your bead board walls bathroom feels cohesive and intentionally designed.
Conclusion
Bead board walls offer a transformative solution for bathroom design that balances timeless appeal with practical benefits. Throughout this article, we've explored how this versatile material can elevate your space through careful selection, creative installation methods, and proper maintenance. The three key approaches—traditional wainscoting, modern horizontal installation, and dramatic full-height coverage—demonstrate bead board's adaptability to various design preferences and bathroom layouts. Beyond aesthetics, bead board walls provide durability and moisture resistance that make them ideal for bathroom environments. As you consider incorporating bead board into your bathroom, remember that success lies in the details: proper preparation, thoughtful paint choices, and complementary accessories that enhance rather than compete with the bead board's distinctive character. Looking ahead, bead board continues to evolve with new materials and installation techniques while maintaining its classic appeal. Whether you're planning a complete bathroom renovation or a simple refresh, bead board walls offer a cost-effective way to add architectural interest and lasting beauty to your space. Start by visualizing how different bead board approaches might work in your specific bathroom, considering factors like natural light, existing fixtures, and your personal style. With proper planning and execution, bead board can transform your bathroom into a space that feels both fresh and timeless—a perfect blend of form and function that you'll enjoy for years to come.
Frequently Asked Questions
Q: Can bead board walls be installed in a small bathroom without making it feel cramped?
Absolutely. Bead board walls can actually enhance small bathrooms when installed strategically. Vertical installation creates the illusion of height, making ceilings appear taller. For maximum space-enhancing effects, paint the bead board in light, reflective colors like white or pale gray. Consider installing bead board on just one wall as an accent rather than covering all surfaces. This adds character without overwhelming the space. Horizontal installation can also work well in narrow bathrooms, creating visual width. The key is maintaining consistent colors and avoiding busy patterns that compete with the bead board's clean lines.
Q: How do I protect bead board walls from bathroom moisture and humidity?
Proper protection starts with material selection. PVC or moisture-resistant MDF bead board performs better in humid environments than traditional wood. Ensure proper bathroom ventilation with an effective exhaust fan rated for your bathroom's size. Run the fan during and for 20-30 minutes after showers. Use high-quality, moisture-resistant paint in semi-gloss or satin finishes, which create a more protective barrier than flat paints. Apply caulk carefully along all seams and edges to prevent moisture penetration. Regular maintenance includes wiping down surfaces after steamy showers and addressing any condensation issues promptly. With these precautions, bead board walls can withstand bathroom conditions beautifully.
Q: What's the typical cost range for installing bead board walls in a standard bathroom?
Costs vary based on materials, labor, and bathroom size. For a standard 5×8 bathroom, materials typically range from $200-$800. Traditional wood bead board costs more ($3-$8 per square foot) than PVC or MDF options ($2-$5 per square foot). Professional installation adds $500-$1,500 depending on complexity and regional rates. DIY installation can save significantly if you have basic carpentry skills. Additional costs include paint ($30-$80 per gallon), trim pieces, and tools if needed. A full bathroom transformation with bead board wainscoting might total $800-$2,500 professionally installed, while a simple accent wall could cost $300-$800. Get multiple quotes and consider your long-term enjoyment of the space when budgeting.