
Imagine the joy on your child’s face as they create imaginary pies, mix up mud potions, and serve up nature’s finest ‘dishes’ in their very own outdoor play kitchen. A DIY mud kitchen isn’t just a toy—it’s a portal to endless creativity, sensory exploration, and hours of screen-free entertainment. In today’s world where children are increasingly drawn to digital devices, creating an outdoor mud kitchen provides a tangible, hands-on alternative that nurtures imagination, motor skills, and a connection to nature. These simple play spaces have become beloved backyard features in homes everywhere, transforming ordinary outdoor areas into wonderlands of messy, educational fun. What makes them particularly appealing is their accessibility: you don’t need expensive materials or professional skills to build one. With some basic tools, recycled materials, and a weekend of work, you can create a custom play kitchen that will become the centerpiece of your backyard play area for years to come. This article will guide you through everything you need to know to plan, build, and enjoy your own DIY mud kitchen, from choosing the perfect location to selecting safe, durable materials that withstand weather and enthusiastic play. Whether you’re looking to encourage outdoor play, foster creativity, or simply provide a special space where your children can make happy memories, a DIY mud kitchen offers countless benefits that go far beyond just keeping kids entertained.
Planning Your DIY Mud Kitchen: Essential First Steps
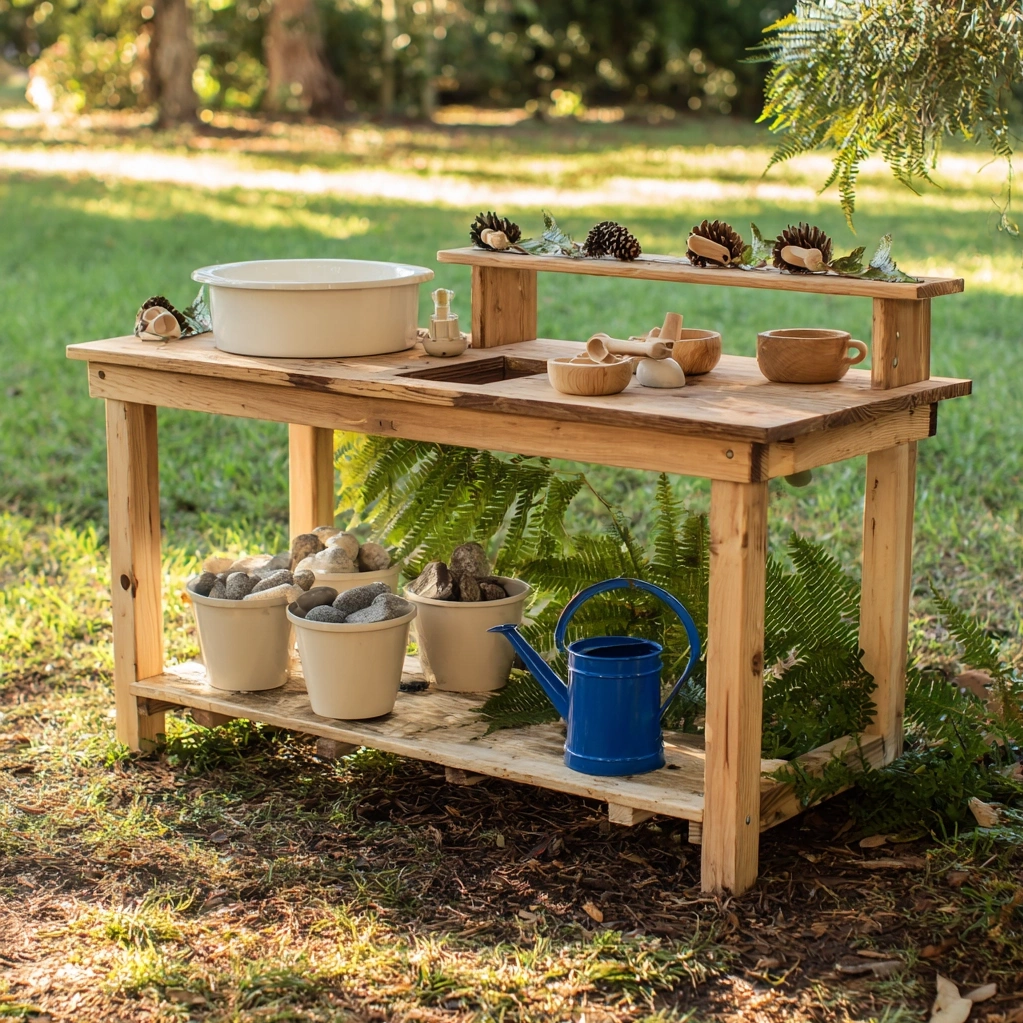
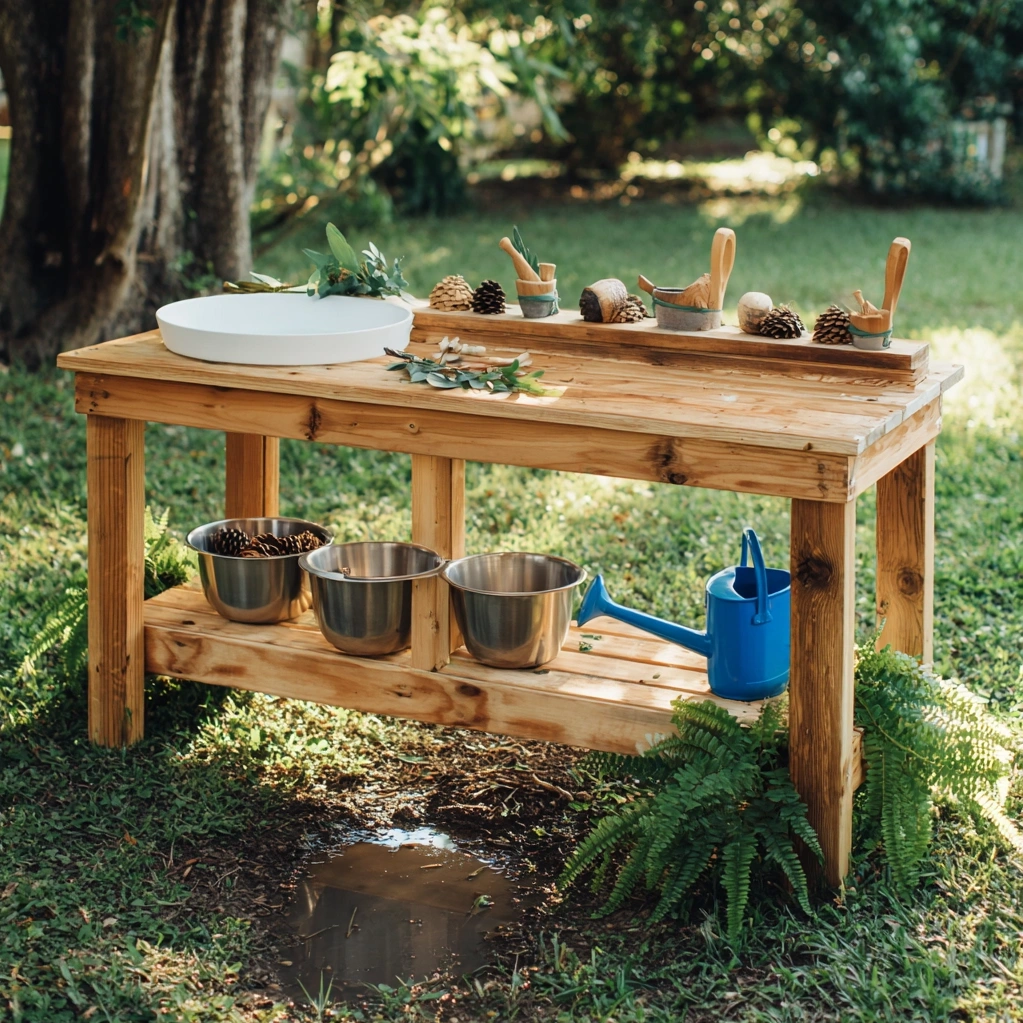
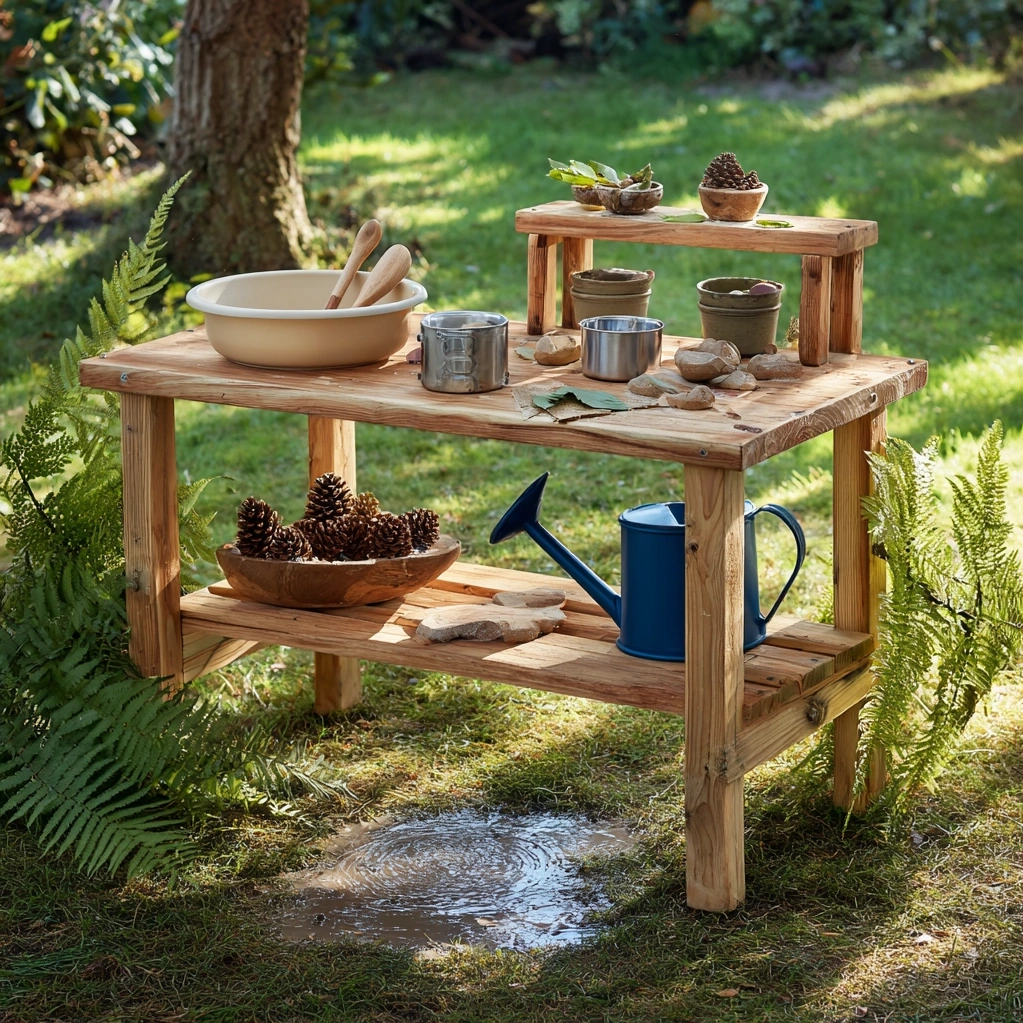
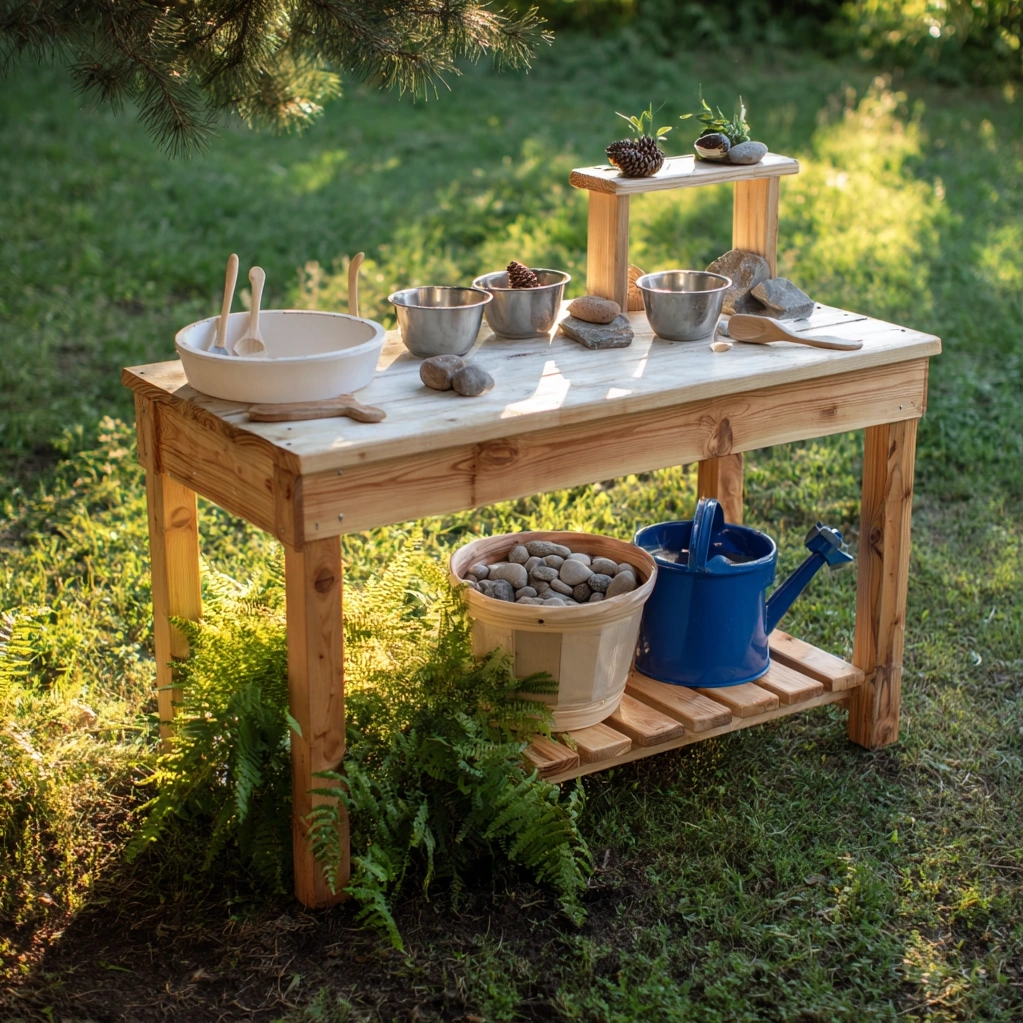
Before you grab your tools, thoughtful planning ensures your DIY mud kitchen project succeeds and delights your little chefs. Start by choosing the perfect location in your yard—ideally a flat, well-drained spot with partial shade to protect children from harsh sun while allowing plenty of natural light for play. Consider proximity to a water source too, as mud kitchens thrive with easy access for mixing and cleaning. Next, think about size and scale. A standard DIY mud kitchen typically measures about 3-4 feet wide and 2-3 feet deep, with a counter height of 18-24 inches depending on your child's age. This ensures comfortable access while standing or sitting on a small stool. Sketch a simple design on paper, noting where you'll place key elements like a mixing station, storage shelves, and perhaps a small sink area. Material selection comes next. While you can purchase pre-cut wood from hardware stores, many families repurpose old furniture like dressers, cabinets, or wooden crates for an eco-friendly approach. Look for untreated, non-toxic wood that can withstand outdoor conditions. Pressure-treated lumber should be avoided for surfaces children touch frequently. Don't forget to plan for drainage holes in any 'sink' areas and consider adding wheels if you want mobility. Finally, involve your children in the planning process! Ask what features they'd love most—maybe a special spot for their favorite mixing bowls or hooks for hanging utensils. This engagement builds excitement and ensures the finished DIY mud kitchen truly reflects their play preferences.
Building Your DIY Mud Kitchen: Simple Construction Techniques
With your plan in place, building your DIY mud kitchen becomes a rewarding weekend project. Begin by gathering your materials: untreated pine or cedar boards, exterior-grade screws, waterproof wood glue, sandpaper, and any repurposed items like an old basin for a sink. Basic tools include a saw, drill, measuring tape, and safety gear. Start with the frame—cut your boards to size for the legs and supports, ensuring everything is level and square. Assemble using screws and glue for added stability. For the countertop, use a solid piece of wood or join multiple boards with support beams underneath. Sand all surfaces thoroughly to prevent splinters, paying extra attention to edges and corners where little hands will explore. Next, add functional elements that make your DIY mud kitchen special. Install a simple shelf beneath the counter for storing pots, pans, and mixing bowls. Create a 'stove' area by painting circles on the counter or attaching old burner covers. If including a sink, cut an opening for a plastic basin or metal bowl, securing it with brackets or silicone caulk. Add hooks along the sides for utensils and aprons. For drainage, drill several small holes in the sink basin or create a sloped counter that directs water away from the structure. Consider painting your DIY mud kitchen with non-toxic, outdoor-safe paint in cheerful colors—bright blues, greens, or natural wood stains all work beautifully. Apply a clear waterproof sealant to protect the wood from moisture and extend its lifespan. Remember that imperfections add character; this doesn't need to be perfect carpentry, just safe and functional. As you build, test stability frequently, ensuring nothing wobbles when children lean or play vigorously.
Accessorizing Your DIY Mud Kitchen for Maximum Play Value
The magic of a DIY mud kitchen truly comes alive with thoughtful accessories that inspire imaginative play. Start with basic kitchen tools that are durable and safe for outdoor use: metal or plastic bowls, measuring cups, spoons, whisks, and silicone muffin tins make excellent additions. Visit thrift stores or rummage through your own kitchen for items you no longer need—old baking sheets, colanders, and teapots become fantastic mud kitchen props. Avoid anything with sharp edges or small parts that could pose choking hazards. Natural materials elevate the play experience dramatically. Keep baskets of pinecones, smooth stones, leaves, and flower petals nearby for 'ingredients.' Children love creating mud pies decorated with pebble 'chocolate chips' or leaf garnishes. Add a small water source if possible—a simple watering can or bucket with a ladle allows for perfect mud consistency mixing. Storage solutions keep your DIY mud kitchen organized and inviting. Install hooks for hanging utensils, add bins or crates for loose parts, and consider a small shelf for displaying 'finished creations.' A chalkboard panel attached to one side lets children write menus or label their concoctions. Rotate accessories seasonally to maintain interest; in fall, add gourds and acorns, while summer might feature seashells and herb clippings. Don't overlook practical elements like a nearby towel hook or a small mat for wiping feet. The best DIY mud kitchen accessories encourage open-ended play where children invent their own recipes and scenarios. Watch as they serve mud tea to stuffed animals, create 'soup' for fairy friends, or run a backyard restaurant. These simple additions transform your basic structure into a rich sensory environment that grows with your child's imagination.
Conclusion
Creating a DIY mud kitchen offers far more than just another play structure—it builds a foundation for creativity, sensory learning, and cherished childhood memories. Throughout this guide, we've explored how thoughtful planning, simple construction, and creative accessorizing come together to create an outdoor play space that engages children for hours while developing their motor skills, problem-solving abilities, and connection to nature. The beauty of a DIY mud kitchen lies in its adaptability; you can start with a basic design and expand over time, adding new features as your children's interests evolve. Perhaps you'll incorporate a herb garden nearby for 'fresh ingredients' or build a companion mud cafe with seating for friends. As seasons change, your mud kitchen transforms too—from spring flower potions to autumn leaf stews to winter 'snow cream' creations. Looking forward, consider how this project might inspire other family DIY adventures. The skills you've gained building this structure could lead to garden boxes, birdhouses, or simple outdoor furniture. More importantly, you've created a space where imagination flourishes without batteries, screens, or instructions. Your DIY mud kitchen stands as a testament to the value of hands-on play and the joy of creating something meaningful together. As your children grow, they'll remember not just the mud pies they made, but the time you invested in building their special place. That's the true magic of this simple, wonderful project.
Frequently Asked Questions
Q: What age is appropriate for a DIY mud kitchen?
DIY mud kitchens are wonderful for children aged approximately 2 to 10 years, with supervision for younger toddlers. Toddlers around 18-24 months begin enjoying sensory play with mud and water, making simple mud kitchens with low counters and large utensils perfect starters. Preschoolers (3-5 years) engage in more complex imaginative play, benefiting from added features like sinks and storage. School-aged children (6-10) continue enjoying mud kitchens for creative experimentation and social play with friends. Always tailor the height and complexity to your child's developmental stage, and supervise appropriately, especially around water sources. The beauty of a DIY mud kitchen is its adaptability—you can modify elements as your child grows.
Q: How do I maintain and clean our DIY mud kitchen?
Proper maintenance keeps your DIY mud kitchen safe and inviting for years. After each play session, encourage children to rinse utensils and bowls with water, storing them in covered bins to prevent mosquito breeding. Periodically scrub surfaces with a mild soap solution and soft brush to remove dried mud and debris. For wooden structures, inspect annually for wear, sanding any rough spots and reapplying non-toxic waterproof sealant as needed. During winter or extended non-use, move accessories indoors or cover the kitchen with a waterproof tarp. To prevent mold, ensure proper drainage and air circulation around the structure. Natural cleaning methods work well—vinegar solutions help remove mineral deposits from water play. Regular maintenance takes just minutes but significantly extends your kitchen's lifespan and hygiene.
Q: Can I build a DIY mud kitchen if I have limited space or budget?
Absolutely! DIY mud kitchens excel at adaptability for any space or budget. For small yards or balconies, create a compact version using a single wooden crate or repurposed bedside table—add a bowl sink and a few hooks for utensils. Even a sturdy plastic storage bin turned on its side makes an instant portable mud kitchen. Budget-friendly builders can source materials entirely from recycled items: old cabinets from curb alerts, discarded bowls from thrift stores, and fallen branches for utensil hooks. Basic tools like a handsaw and drill often suffice; many hardware stores offer inexpensive tool rentals. The simplest designs require under $50 in new materials, while repurposed projects might cost almost nothing. Remember, children value functionality over perfection—a creatively assembled mud kitchen from found objects often sparks more imagination than expensive store-bought versions.