
Imagine stepping into your backyard and discovering a beautiful, functional space that transforms ordinary barbecues into extraordinary gatherings. A DIY grill gazebo isn’t just another home improvement project—it’s a game-changer for outdoor living. This versatile structure protects your grill from the elements, creates a dedicated cooking area, and elevates your entire backyard aesthetic. Whether you’re a seasoned grilling enthusiast or someone who enjoys casual weekend cookouts, building your own grill gazebo offers practical benefits and personal satisfaction. You’ll extend your grilling season, protect your investment in quality equipment, and create a focal point that enhances property value. Many homeowners hesitate, thinking such projects require professional skills or significant budgets. However, with proper planning and the right guidance, creating your own DIY grill gazebo becomes an achievable weekend project. This comprehensive guide walks you through everything from initial planning to final touches. You’ll discover how to choose materials, design for functionality, and incorporate personal style elements. Your backyard deserves more than just a grill sitting on a patio. It deserves a purpose-built space that celebrates outdoor cooking and entertaining. The journey begins with understanding why this addition matters so much for modern living. Outdoor spaces have become extensions of our homes, and a well-designed grill gazebo creates that perfect transition between indoor comfort and outdoor freedom. Let’s explore how you can create this backyard centerpiece yourself.
Planning Your Perfect DIY Grill Gazebo: Essential First Steps
Before purchasing materials or swinging a hammer, proper planning ensures your DIY grill gazebo project succeeds. Start by assessing your available space. Measure the area where you intend to build, considering both the gazebo's footprint and necessary clearance around your grill. Most grill gazebos require at least 10×10 feet of space, but smaller designs can work in compact yards. Consider sun exposure throughout the day—you might want shade during afternoon cooking but morning sun for breakfast grilling. Check local building codes and homeowners association regulations. Some areas require permits for permanent structures, especially if they exceed certain dimensions or include electrical wiring. Determine your budget realistically. A basic DIY grill gazebo can cost $500-$1,500 in materials, while more elaborate designs with premium materials might reach $3,000. Think about your primary use cases. Will this space mainly serve cooking functions, or should it double as an outdoor dining area? Your answer influences size, layout, and feature choices. Choose between permanent and portable designs. Permanent gazebos offer stability and can incorporate more features, while portable options provide flexibility if you might relocate. Sketch your design, noting key measurements and material requirements. This visual plan helps identify potential issues before construction begins. Consider future needs too. You might want to add lighting, storage shelves, or counter space later. Planning for these elements now makes integration easier. Finally, gather necessary tools. Basic power tools like a drill, circular saw, and level will be essential, along with safety equipment. Proper planning transforms an overwhelming project into manageable steps, setting the foundation for your successful DIY grill gazebo.
Material Selection for Your DIY Grill Gazebo: Durability Meets Style
Choosing the right materials significantly impacts your DIY grill gazebo's longevity, appearance, and maintenance requirements. For the frame, pressure-treated lumber offers excellent weather resistance at an affordable price. Cedar and redwood provide natural resistance to insects and decay while offering beautiful grain patterns. For a modern look, consider metal frames made from powder-coated aluminum or galvanized steel. These require minimal maintenance and withstand harsh weather conditions exceptionally well. Roofing materials deserve careful consideration. Corrugated polycarbonate panels allow light transmission while providing waterproof protection. They're lightweight and easy to install. Asphalt shingles match your home's roof for a cohesive look but require more structural support. Metal roofing offers durability and excellent water runoff. For flooring, concrete pavers create a stable, level surface that withstands heat and spills. Gravel provides good drainage at lower cost but requires occasional replenishment. Composite decking offers the wood look without maintenance hassles. Consider countertop materials for food preparation areas. Stainless steel resists heat and cleans easily but can show fingerprints. Tile offers design flexibility but requires grout maintenance. Butcher block provides a warm, traditional look but needs regular sealing. Don't forget about fasteners. Use galvanized or stainless steel screws and bolts to prevent rust stains. For finishing touches, select stains or paints specifically formulated for exterior use. These protect wood from UV damage and moisture. Consider adding screening material to keep insects away during evening grilling sessions. The right material choices balance budget, aesthetics, and practicality, ensuring your DIY grill gazebo serves you well for years. Remember that quality materials might cost more initially but save money through reduced maintenance and longer lifespan.
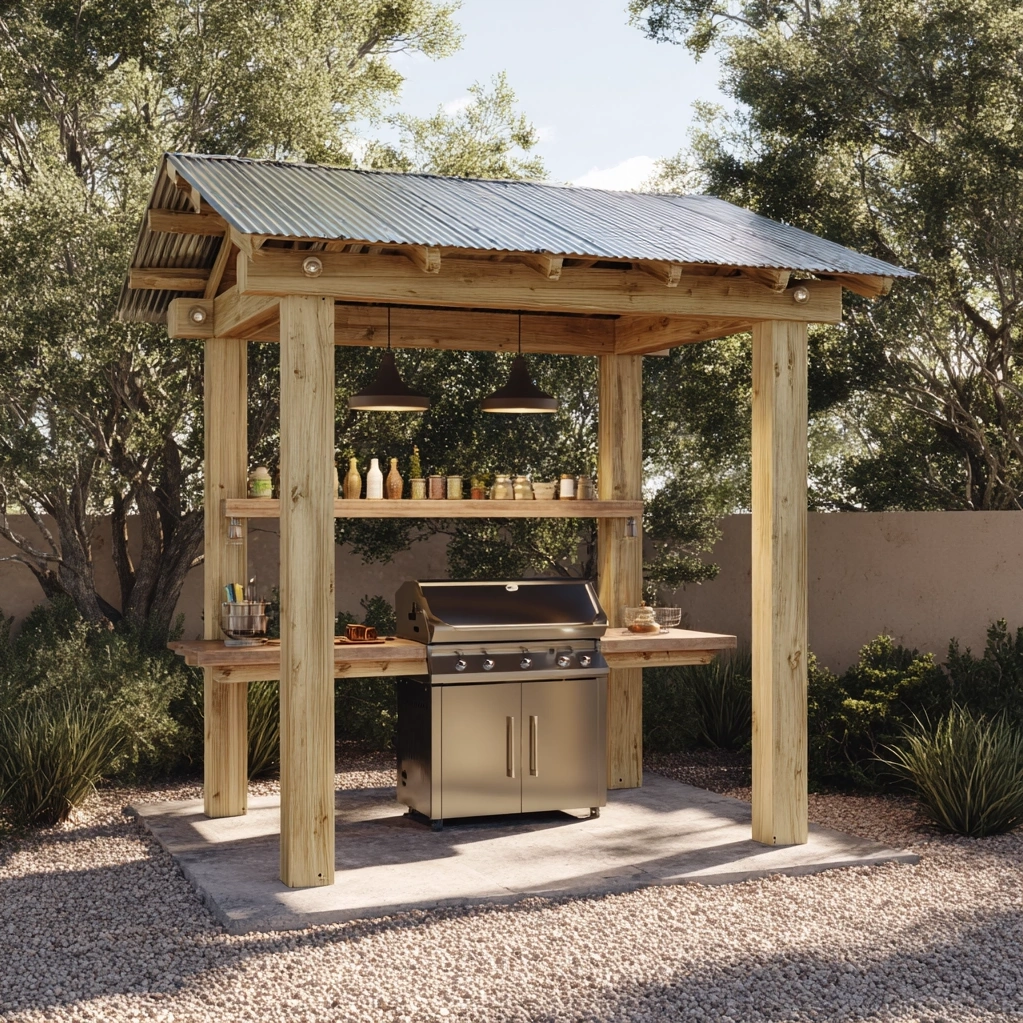
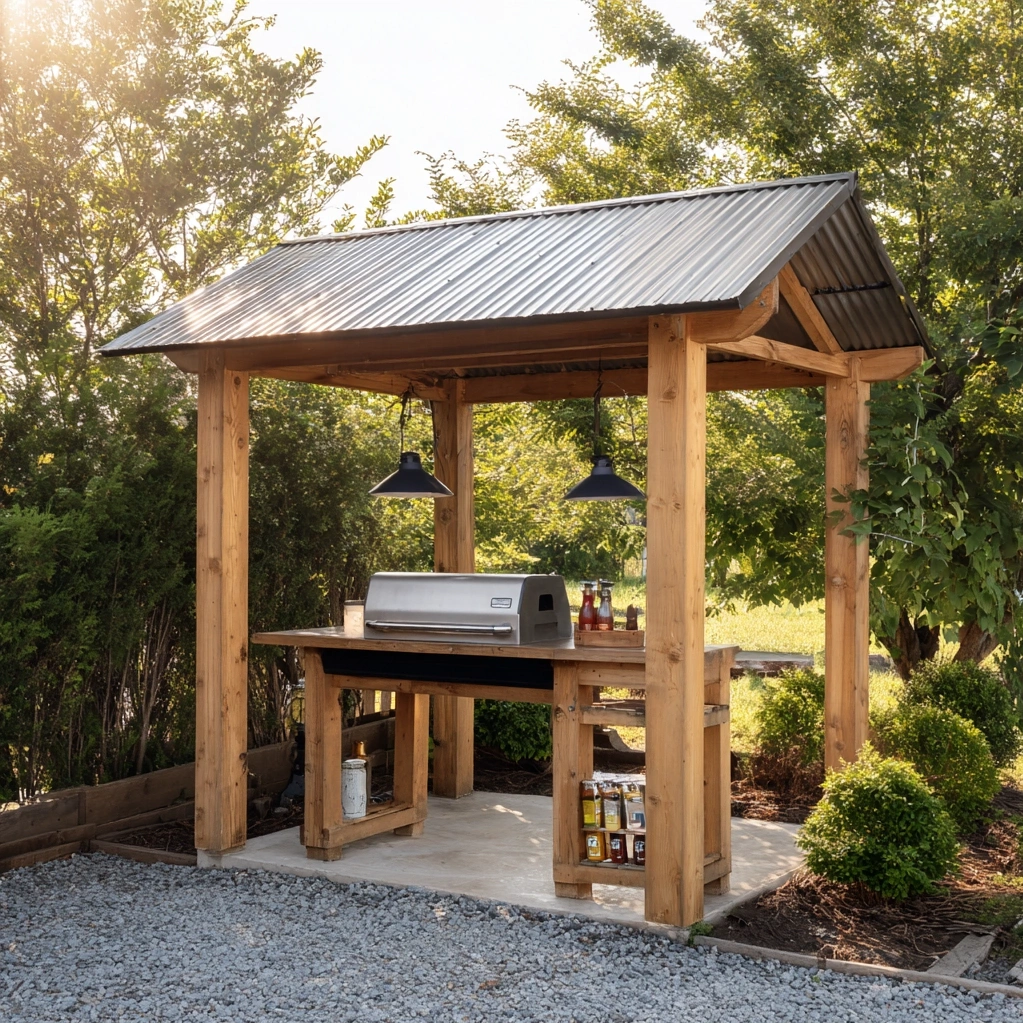
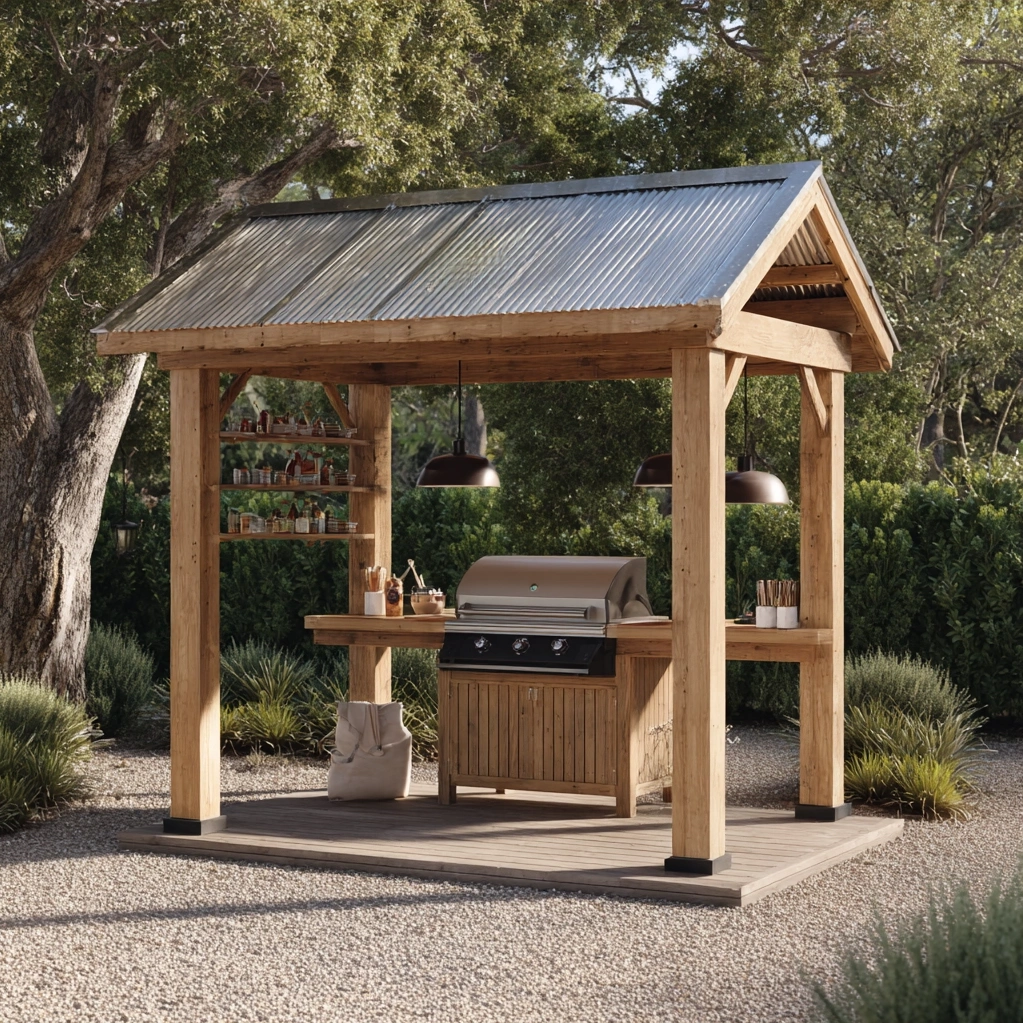
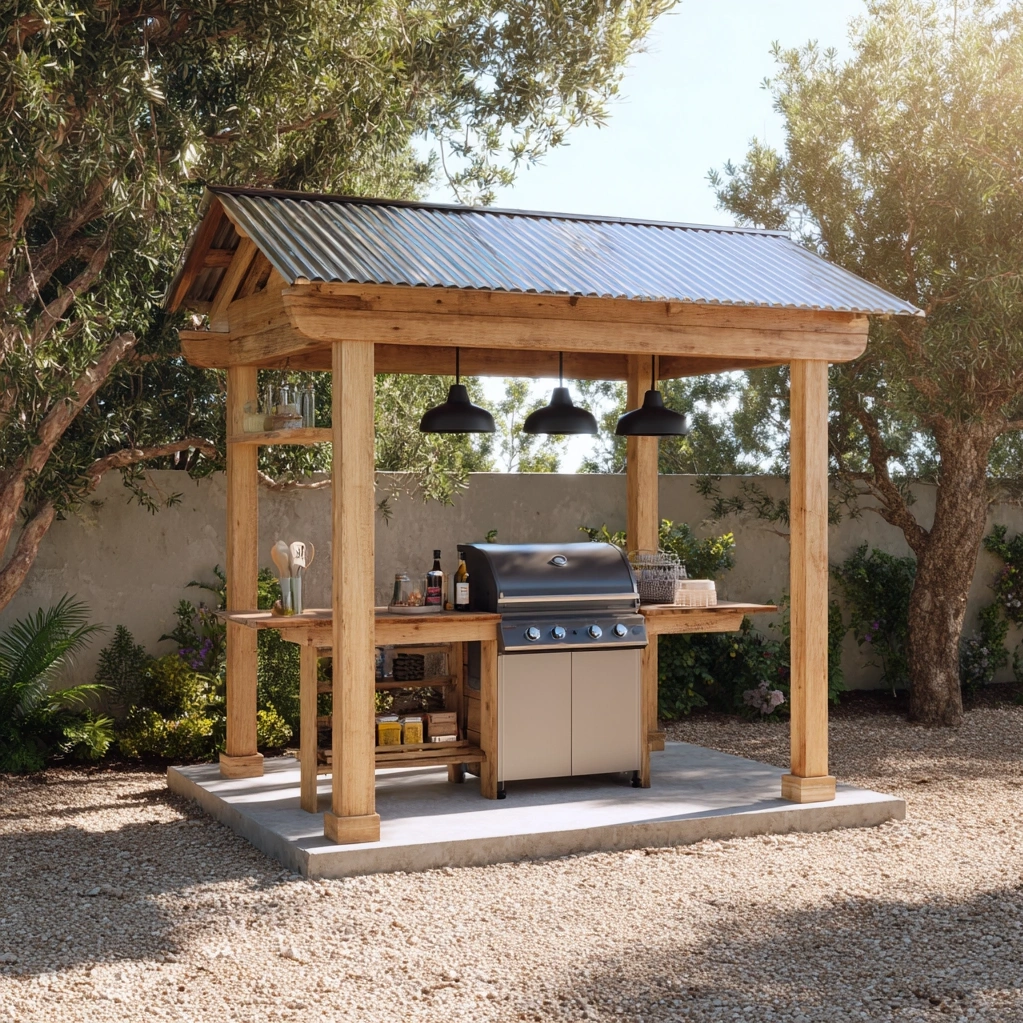
Building Your DIY Grill Gazebo: Step-by-Step Construction Guide
With plans finalized and materials gathered, construction begins. Start by preparing the site. Clear vegetation and level the ground. For permanent structures, consider pouring concrete footings for stability, especially in areas with frost heave. Mark your layout using stakes and string, ensuring perfect square corners. Build the foundation first. For deck-style gazebos, construct a sturdy frame using 2×6 or 2×8 pressure-treated lumber. Secure it to footings or concrete blocks. Install floor joists 16 inches on center for proper support. Add decking boards, leaving small gaps for drainage. Erect the vertical posts next. Use 4×4 or 6×6 posts depending on your design height and roof load. Secure them with post anchors or concrete for stability. Check plumb with a level before proceeding. Install horizontal beams connecting the posts at the top. These support the roof structure. For added strength, consider diagonal bracing between posts. Construct the roof framework. Simple gable roofs work well for most DIY grill gazebo projects. Cut rafters to the appropriate pitch and secure them to ridge boards. Add roof sheathing if using shingles, or install purlins for panel roofing. Apply your chosen roofing material, working from the bottom upward with proper overlap. Install countertops and storage areas at comfortable heights. Standard counter height is 36 inches, but adjust based on your preferences. Add shelves for grilling tools and ingredients. Consider incorporating a small sink if plumbing access exists. Finish with protective treatments. Apply stain or paint to wood surfaces before adding final touches. Install lighting for evening use—solar-powered options work well without wiring. Add hooks for utensils and towels. Test the space with your grill in position before considering the project complete. Ensure adequate ventilation around the grill and proper clearance from combustible materials. Building your DIY grill gazebo requires patience and attention to detail, but following these steps creates a functional, beautiful outdoor space you'll enjoy for seasons to come.
Conclusion
Creating your own DIY grill gazebo represents more than just a construction project—it's an investment in lifestyle enhancement. This structure transforms how you experience outdoor living, providing shelter, organization, and aesthetic appeal to your backyard cooking area. The process teaches valuable skills while yielding tangible results you can enjoy immediately. Remember that the most successful projects balance careful planning with flexible execution. Don't hesitate to modify designs based on your specific needs and available materials. The beauty of DIY lies in customization; your grill gazebo should reflect your personal style and functional requirements. As you complete this project, consider how it might evolve. You could add side curtains for wind protection, install a small refrigerator for beverage storage, or incorporate planters for fresh herbs. These additions enhance functionality without requiring major reconstruction. Share your experience with friends and family—your success might inspire others to undertake their own outdoor improvement projects. Most importantly, take time to appreciate your creation. Host a gathering, cook a special meal, or simply enjoy a quiet evening in your new outdoor space. The satisfaction of using something you built yourself adds special meaning to every moment spent there. Your DIY grill gazebo becomes not just a structure, but a backdrop for memories made with loved ones. Embrace the journey from concept to completion, and let your backyard transformation begin.
Frequently Asked Questions
Q: How much does it typically cost to build a DIY grill gazebo?
Costs vary based on size, materials, and features. A basic 10×10 foot DIY grill gazebo using pressure-treated lumber and polycarbonate roofing typically costs $500 to $1,200 in materials. Mid-range projects with cedar wood, metal roofing, and basic countertops might range from $1,500 to $2,500. High-end designs with premium materials, electrical wiring, and custom features can reach $3,000 to $5,000. Remember to factor in tool costs if you need to purchase or rent equipment. Many homeowners find they save 40-60% compared to professional installation by doing the work themselves.
Q: Do I need a building permit for a DIY grill gazebo?
Permit requirements depend on your location and project specifics. Generally, permanent structures over 100-200 square feet often require permits, as do those with electrical connections or plumbing. Temporary or portable structures usually don't need permits. Always check with your local building department before starting construction. They can provide specific guidelines for your area. Even if not required, obtaining a permit ensures your structure meets safety standards. Some homeowners associations have additional restrictions, so review those guidelines too. Proper permitting protects your investment and avoids potential issues when selling your home.
Q: What maintenance does a DIY grill gazebo require?
Maintenance needs depend on your material choices. Wood structures require annual inspection and may need re-staining or sealing every 2-3 years to prevent weathering. Check for loose fasteners and tighten as needed. Metal components benefit from occasional cleaning to prevent corrosion. Roofing materials need inspection for damage after severe weather. Clear debris from gutters or roof surfaces regularly. Clean countertops and shelves as you would indoor surfaces. For screened gazebos, repair any tears in screening material promptly. During winter in cold climates, consider removing heavy snow accumulation from the roof. Regular maintenance extends your DIY grill gazebo's lifespan and keeps it looking beautiful year after year.