
Imagine walking into a room that instantly lifts your spirits with vibrant colors, fresh scents, and a touch of personal creativity. That’s the magic of a DIY flower bar—a dedicated space in your home where you can arrange, display, and enjoy floral beauty anytime. In today’s fast-paced world, creating a flower bar isn’t just about decoration; it’s about crafting a personal sanctuary that boosts your mood and enhances your living environment. Whether you’re a seasoned gardener or a complete beginner, a flower bar offers endless opportunities for self-expression and relaxation. It transforms ordinary moments into delightful rituals, from selecting blooms to arranging them in unique ways. This simple addition to your home can become a centerpiece for gatherings, a quiet retreat for mindfulness, or a creative outlet that brightens every day. By setting up your own flower bar, you’re not just adding decor—you’re investing in joy, creativity, and a more beautiful home life. Let’s explore how to create this enchanting space step by step, making it accessible and enjoyable for everyone.
Essential Supplies for Your DIY Flower Bar Setup
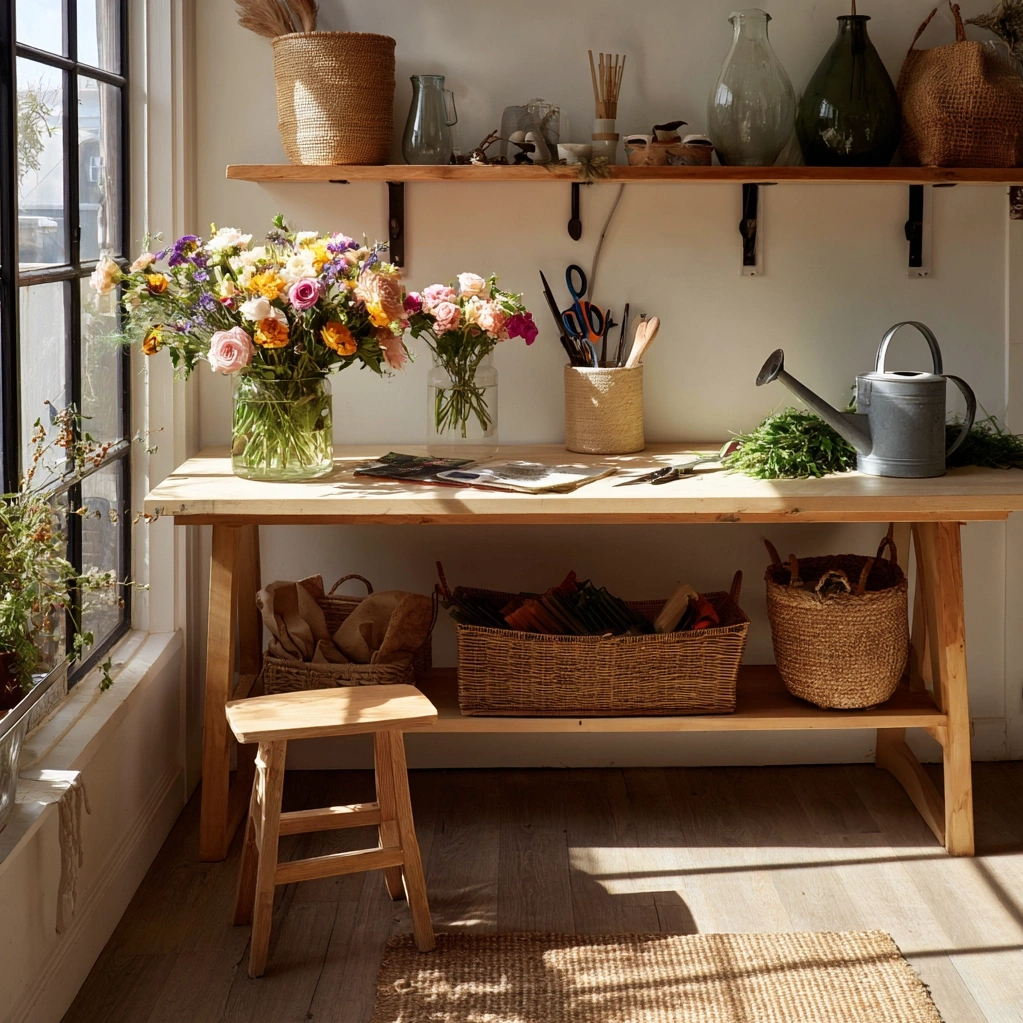
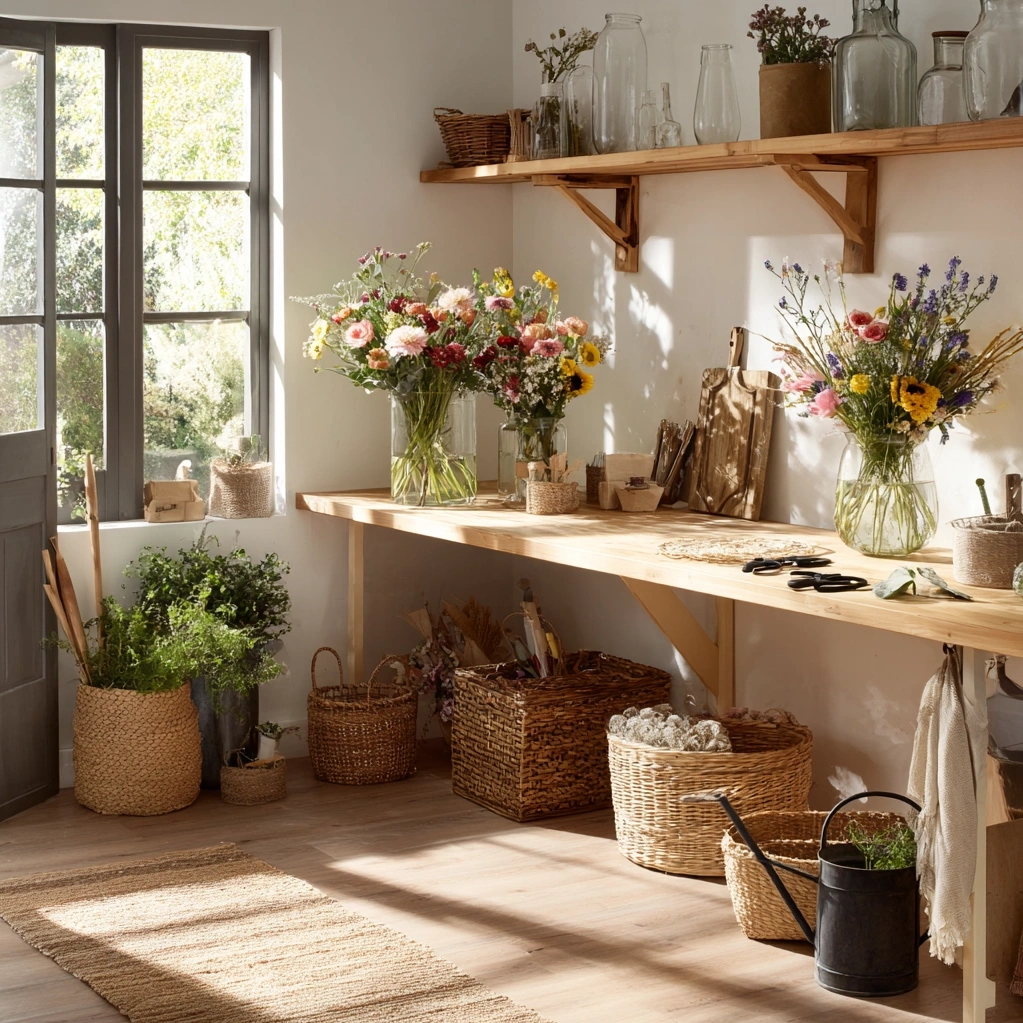
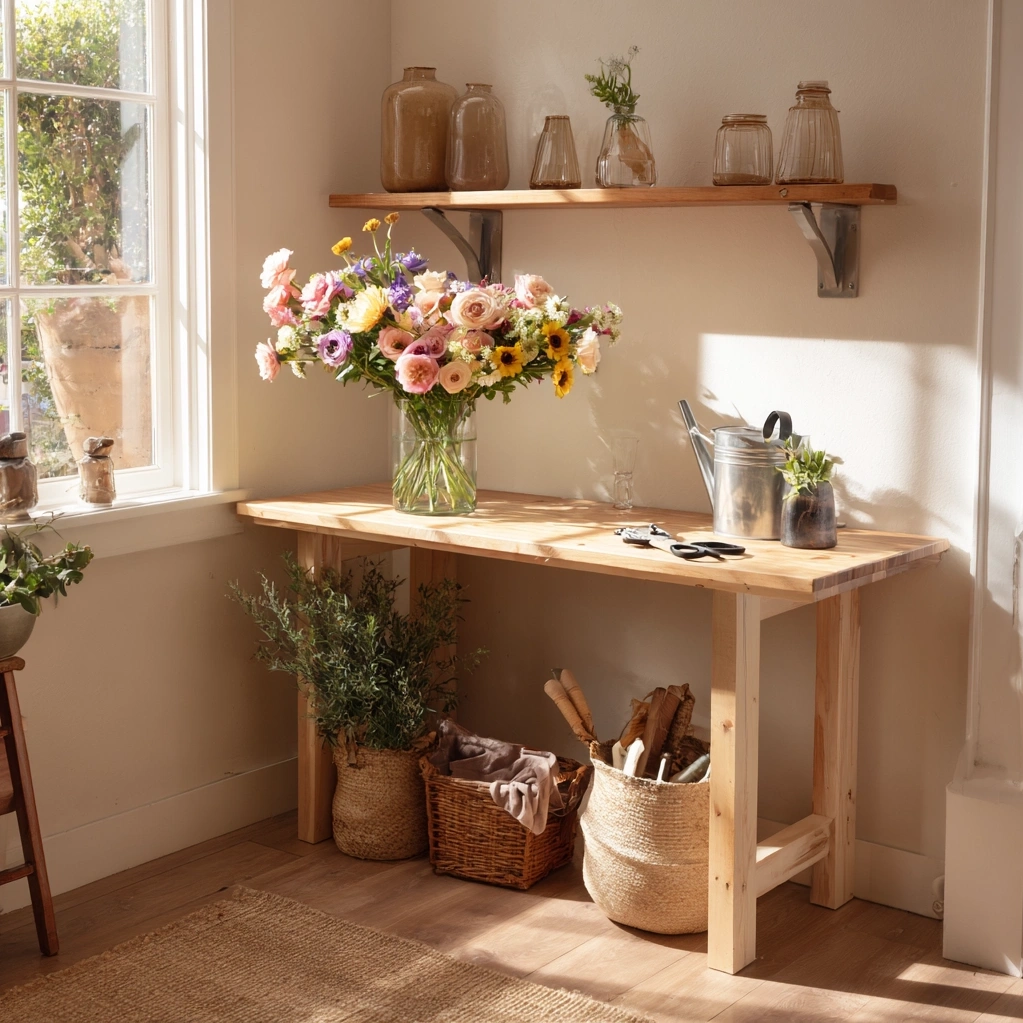
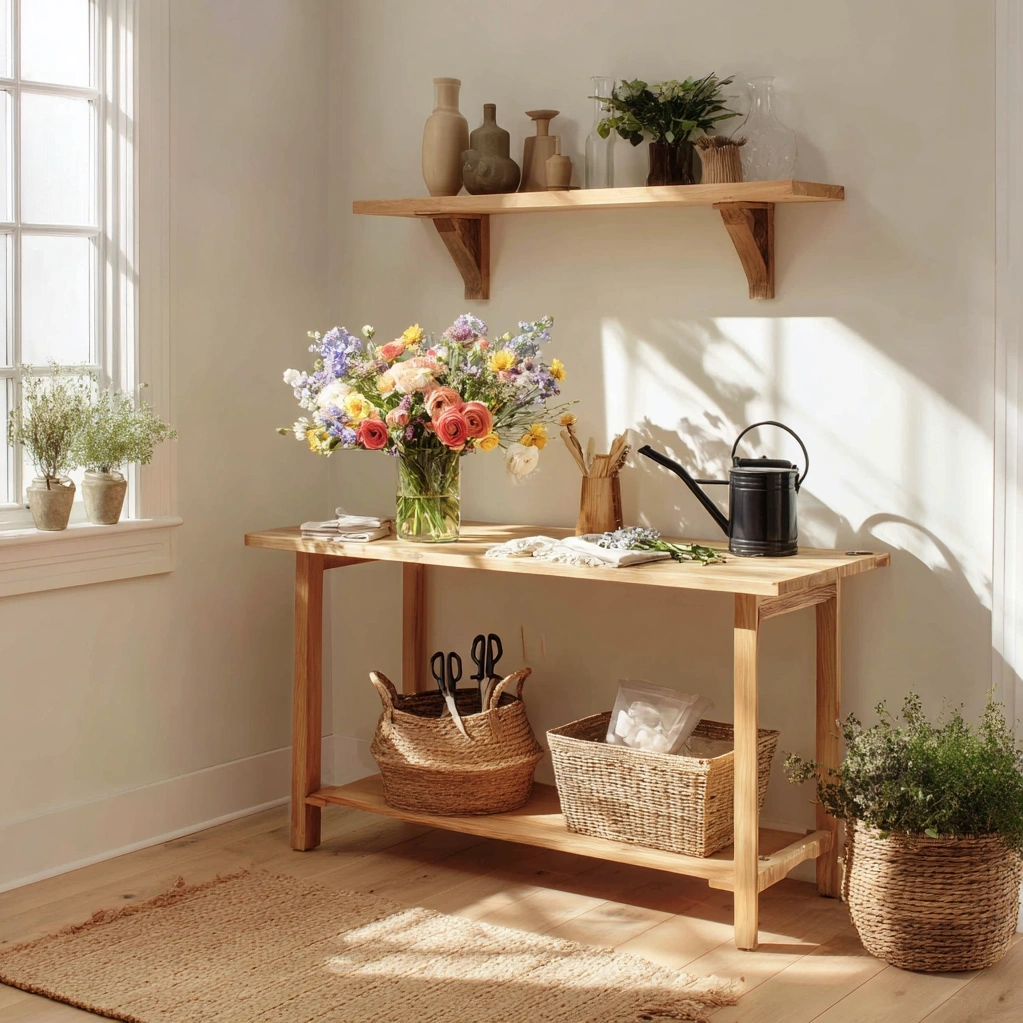
Building a DIY flower bar starts with gathering the right supplies to ensure functionality and beauty. First, you'll need a sturdy surface as your workspace, such as a countertop, table, or cart. Choose something that's easy to clean, like wood or laminate, and large enough to hold your tools and flowers. Next, stock up on vases and containers in various shapes and sizes—think glass jars, ceramic pots, and modern geometric designs. These will hold your arrangements and add visual interest. Essential tools include sharp floral scissors or shears for clean cuts, a floral frog or foam for stability, and pruning tools for trimming stems. Don't forget practical items like a watering can, a spray bottle for misting, and towels for spills. To enhance the experience, add decorative elements like ribbons, twine, or decorative stones. Organize everything with storage solutions like shelves, baskets, or drawers to keep supplies tidy and accessible. By having these basics ready, your DIY flower bar becomes a efficient and inspiring space where creativity can flourish without hassle.
Step-by-Step Guide to Designing Your DIY Flower Bar Layout
Designing the layout of your DIY flower bar is key to making it both functional and aesthetically pleasing. Start by selecting a location with good natural light, such as near a window or in a bright corner, as flowers thrive in sunlight and it enhances their colors. Ensure the area has easy access to water, like a nearby sink, to simplify cleaning and hydration. Arrange your workspace with a clear hierarchy: place your main working surface at a comfortable height, typically countertop level, to prevent strain. Install shelves above or beside the workspace to store vases and tools within arm's reach, using brackets or wall-mounted units for support. Below the surface, add storage like cabinets or open shelves for bulkier items like watering cans and extra supplies. Position a trash bin nearby for clippings to keep the area clean. For visual appeal, incorporate decorative touches like a backdrop of framed botanical prints or a chalkboard for notes. Keep pathways clear to allow easy movement, and consider adding a small stool or chair if you plan to sit while arranging. This thoughtful layout ensures your DIY flower bar is not only beautiful but also practical for daily use.
Creative Ideas for DIY Flower Bar Arrangements and Themes
Once your DIY flower bar is set up, the real fun begins with creating stunning arrangements and themes. Start by selecting a color palette—monochromatic schemes using shades of one color, like all whites or pinks, offer elegance, while complementary colors like yellow and purple create vibrant contrasts. Mix different flower types for texture and interest; combine large blooms like peonies with delicate fillers like baby's breath. For seasonal themes, use spring tulips, summer sunflowers, or autumn chrysanthemums to reflect the time of year. Try unique container ideas, such as repurposed teacups, mason jars, or vintage tins, to add personality to your DIY flower bar. Incorporate greenery like eucalyptus or ferns for a lush, natural look. Experiment with arrangement styles: a classic bouquet in a vase, a sprawling centerpiece for tables, or a hanging installation using macramé holders. Add extras like candles, fairy lights, or decorative stones to enhance the ambiance. For special occasions, create themed displays, such as a romantic setup for anniversaries or a cheerful mix for birthdays. These creative ideas make your DIY flower bar a dynamic space that evolves with your inspiration, keeping your home fresh and inviting.
Conclusion
Creating a DIY flower bar is more than just a home decor project; it's a transformative experience that brings beauty, creativity, and joy into your daily life. By following the steps outlined—from gathering essential supplies to designing a functional layout and exploring creative arrangements—you can build a space that reflects your personal style and enhances your well-being. A flower bar encourages mindfulness, as the act of arranging flowers can be a calming ritual, and it serves as a focal point for social gatherings, adding a touch of elegance to any event. As you continue to use your DIY flower bar, you'll likely discover new techniques, favorite blooms, and ways to adapt it to different seasons or moods. Consider expanding your skills by learning about flower care or trying advanced arrangements. Share your creations with friends and family to spread the inspiration. Ultimately, this simple addition to your home can grow into a cherished hobby that enriches your environment and spirit. Embrace the journey of floral creativity, and let your DIY flower bar blossom into a lasting source of happiness and beauty.
Frequently Asked Questions
Q: What are the best flowers to use for a DIY flower bar?
For a DIY flower bar, choose flowers that are durable, affordable, and easy to arrange. Popular options include roses for their classic beauty, carnations for long-lasting blooms, and daisies for a cheerful touch. Seasonal picks like tulips in spring or sunflowers in summer add variety. Include greenery like eucalyptus or ferns to fill out arrangements. Opt for locally sourced or garden-grown flowers to save money and support sustainability. Avoid highly delicate flowers that wilt quickly, unless you plan to use them immediately.
Q: How do I maintain flowers in my DIY flower bar to keep them fresh?
To keep flowers fresh in your DIY flower bar, start by trimming stems at an angle with sharp scissors before placing them in water. Use clean vases and change the water every two days to prevent bacterial growth. Add flower food or a homemade solution of sugar and bleach to nourish blooms and inhibit decay. Keep flowers away from direct sunlight, heat sources, and drafts to extend their lifespan. Mist them lightly with water to maintain humidity. Remove any wilted leaves or petals promptly to keep arrangements looking vibrant.
Q: Can I create a DIY flower bar in a small space or apartment?
Yes, you can easily create a DIY flower bar in a small space or apartment. Use a compact cart, a narrow table, or even a wall-mounted shelf as your workspace. Opt for multi-functional storage like hanging organizers or stackable bins to save room. Choose smaller vases and tools to fit the scale, and focus on minimalist arrangements with a few key flowers. Position it in a bright corner or near a window to maximize light without taking up floor space. With clever planning, even the tiniest area can host a charming and functional flower bar.