

In our digital age, where thousands of photos live forgotten on phones and clouds, creating my photo gallery has become an essential act of preservation and celebration. These visual collections do more than just display images—they tell our stories, document our journeys, and transform ordinary walls into meaningful landscapes of memory. Your photo gallery serves as a living archive, a daily reminder of moments that shaped you, and a conversation starter that welcomes guests into your world. The importance of curating and displaying photographs extends beyond aesthetics; it’s about creating emotional anchors in your home. A thoughtfully arranged gallery can boost your mood, inspire creativity, and strengthen connections to loved ones. When you invest time in organizing my photo gallery, you’re not just decorating—you’re building a personal sanctuary of cherished moments. This process turns fleeting snapshots into lasting treasures that enrich your daily environment. Whether you’re commemorating family milestones, travel adventures, or artistic pursuits, your gallery becomes a visual autobiography that evolves with you. The act of selecting and arranging these images forces you to reflect on what truly matters, creating a space that reflects your values and experiences. In this article, we’ll explore practical strategies to transform your collection into a stunning display that honors your memories while enhancing your living space.
Creating My Photo Gallery: Planning Your Layout and Theme
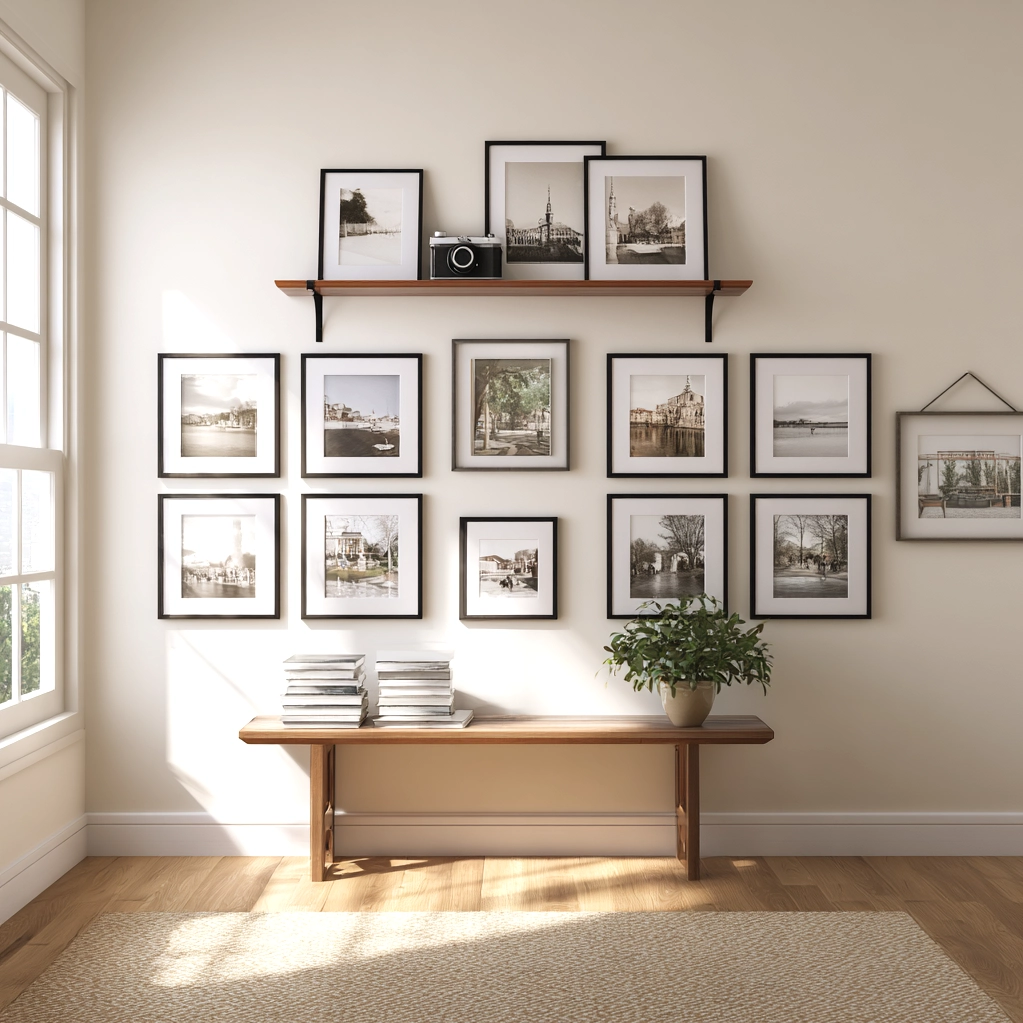
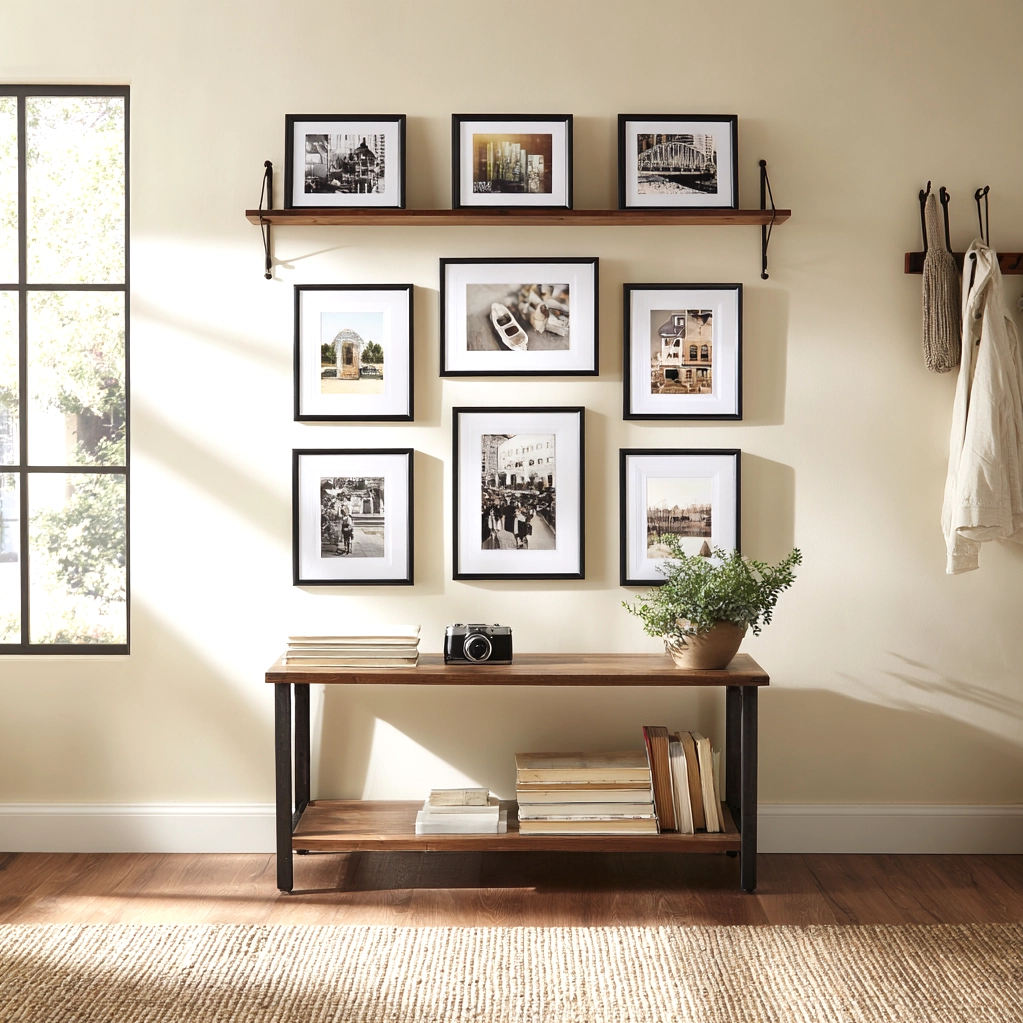
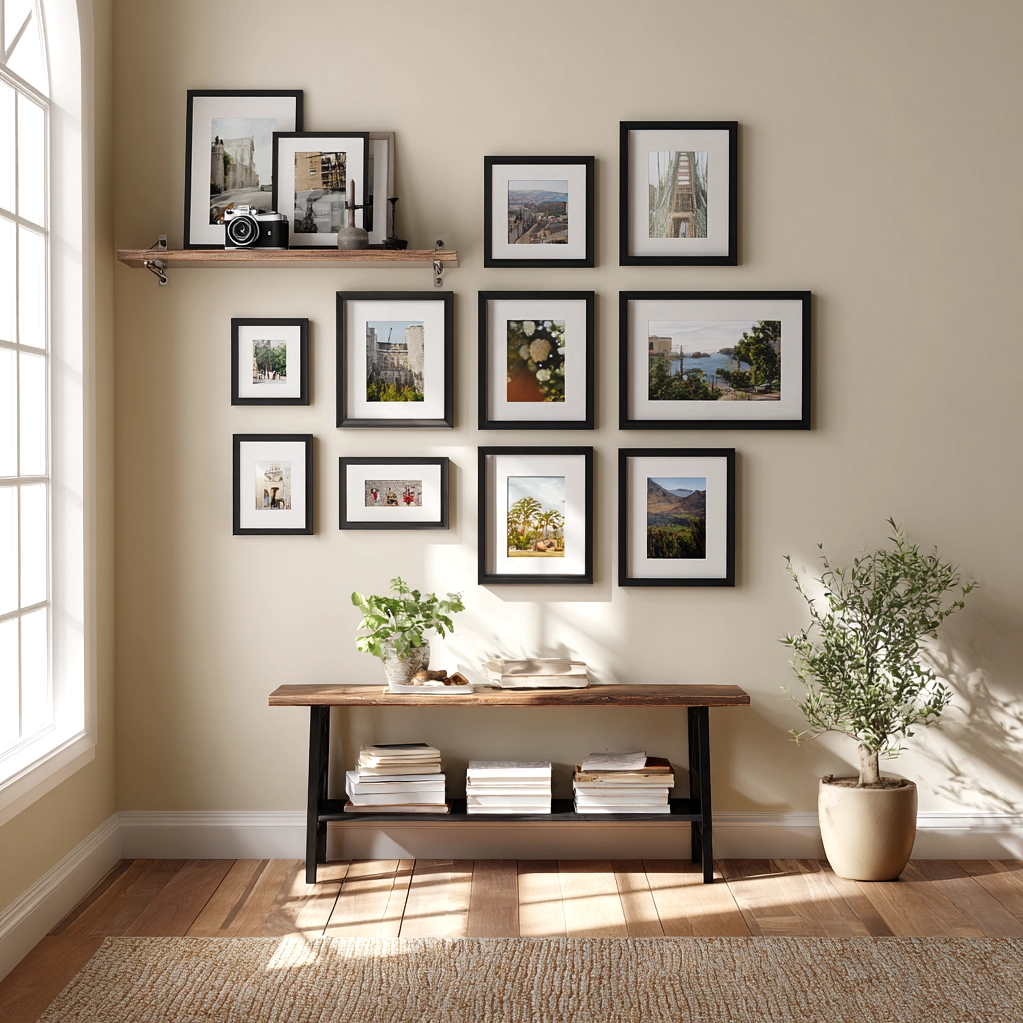
The foundation of any stunning photo display begins with thoughtful planning. Before you hang a single frame, consider the overall theme and narrative you want my photo gallery to convey. Are you showcasing family milestones, travel adventures, or artistic photography? Your theme will guide every decision, from frame selection to arrangement patterns. Start by gathering all potential photos and grouping them by subject, color palette, or chronological order. This curation process helps eliminate clutter and ensures each image contributes meaningfully to your story. Next, measure your wall space and create a mock layout using paper templates or digital tools. This prevents unnecessary holes in your walls and allows you to experiment with different arrangements. Consider the visual weight of your frames—mix sizes and orientations for dynamic interest while maintaining balance. A common approach is creating a grid pattern for uniformity or a salon-style cluster for eclectic charm. Pay attention to spacing between frames; consistent gaps (usually 2-3 inches) create cohesion. Don't forget about eye level—position the center of your arrangement at approximately 57 inches from the floor for optimal viewing. Lighting plays a crucial role too. Ensure your gallery receives adequate natural or artificial light without creating glare on glass surfaces. For larger walls, consider creating focal points with statement pieces surrounded by smaller complementary images. Remember that my photo gallery should evolve with time, so leave room for future additions. This planning stage might seem meticulous, but it transforms random photo hanging into intentional storytelling that enhances your space emotionally and aesthetically.
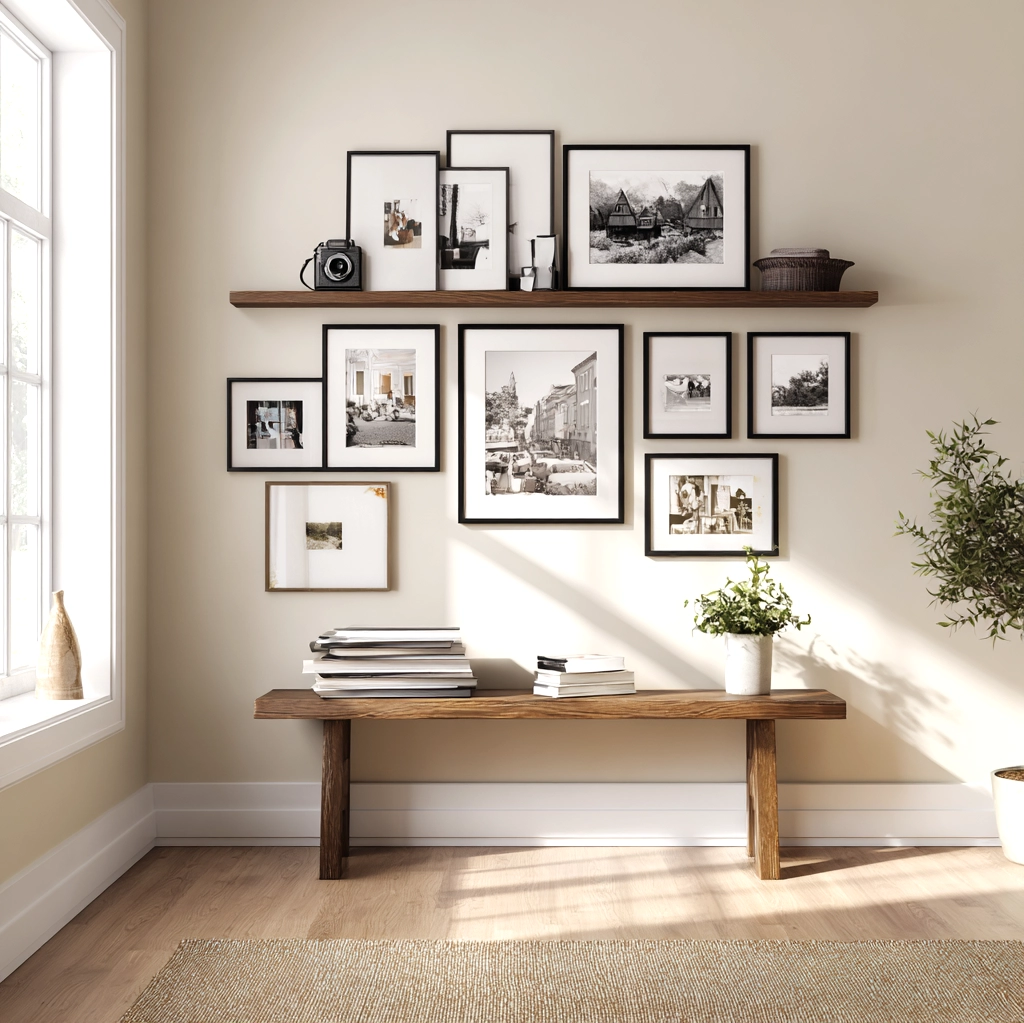
Essential Elements for My Photo Gallery: Frames, Mats, and Lighting
The components surrounding your photographs significantly impact how my photo gallery is perceived and preserved. Frame selection goes beyond mere decoration—it protects your images and establishes visual harmony. Choose frames that complement both your photos and your room's decor. For a cohesive look, maintain consistency in frame style or color across your display. Wood frames offer warmth and tradition, while metal frames provide modern sleekness. Consider mixing materials thoughtfully for added texture. Mats (the borders inside frames) serve practical and aesthetic purposes. They prevent photos from touching glass, allow for expansion in humidity changes, and draw attention to your images. White or neutral mats create clean, gallery-like presentations, while colored mats can enhance specific tones in your photographs. Always use acid-free mats and backing to prevent deterioration over decades. Lighting deserves special attention in my photo gallery design. Proper illumination highlights your images without causing damage. Avoid direct sunlight, which fades photos over time. Instead, use indirect natural light or install adjustable track lighting or picture lights. LED options are ideal as they emit minimal heat and UV radiation. For larger galleries, consider layering light sources—ambient lighting for overall visibility and accent lighting for specific pieces. Don't overlook the importance of hanging hardware. Use appropriate hooks and wires for your wall type and frame weight. Museum putty can secure smaller frames without nails. These elements work together to create a professional-looking display that protects your memories while enhancing your room's atmosphere. Investing in quality materials ensures my photo gallery remains beautiful for years, becoming an heirloom-quality feature in your home.
Personalizing My Photo Gallery: Mixing Media and Adding Meaning
What makes my photo gallery truly special is the personal touches that reflect your unique story. While photographs form the core, consider incorporating mixed media elements that add depth and context. Small shadow boxes can display meaningful objects alongside related photos—a seashell from a beach vacation next to sunset shots, or a concert ticket beneath performance images. This layering creates richer narratives that engage viewers beyond the visual. Text elements can powerfully personalize your display. Handwritten captions, printed quotes, or vintage postcards interspersed among photos add literary dimension. For family galleries, include birth announcements, handwritten recipes, or love letters that complement portrait photographs. Consider creating thematic clusters within my photo gallery. A travel section might combine photos with maps, currency, or transportation tickets arranged geographically. A family history corner could blend vintage photographs with genealogical documents and heirloom fabric swatches. Don't limit yourself to traditional wall displays. Incorporate floating shelves where framed photos can lean against the wall alongside small plants or decorative items. This creates dimensional interest and allows for easy rotation of images. Another personalization technique involves creative matting—cut mats in unique shapes or layer multiple mats in contrasting colors. For black and white photographs, consider tinted mats that pick up room colors. The most meaningful galleries often include imperfect elements: a slightly crooked frame, a handwritten label, or a repaired vintage photo. These imperfections add character and authenticity to my photo gallery. Remember that personalization should enhance rather than overwhelm your photographs. Each added element should have clear purpose and connection to your images, creating a cohesive narrative that feels authentically yours.
Maintaining and Evolving My Photo Gallery Over Time
A dynamic photo gallery requires ongoing attention to remain fresh and meaningful. Regular maintenance ensures your display continues to enhance your space without becoming stagnant. Start with seasonal evaluations of my photo gallery. Every few months, assess which images still resonate and which might need rotation. This doesn't require complete overhaul—sometimes swapping just a few frames refreshes the entire arrangement. Keep a collection of additional framed photos in storage for easy substitutions. Cleaning is essential for presentation and preservation. Dust frames and glass regularly using microfiber cloths. For deeper cleaning, remove photos carefully and clean both sides of glass, checking for any signs of moisture or damage. Monitor lighting conditions as seasons change—adjust curtains or artificial lighting to maintain consistent illumination without glare. Consider the natural evolution of my photo gallery as your life changes. Major milestones—births, weddings, graduations—naturally prompt updates. Create intentional space for new additions during your initial planning, or designate a specific wall section for recent memories. Digital integration offers modern maintenance solutions. Create QR codes linking to digital albums or videos, print them in small frames, and incorporate them discreetly into your display. This bridges physical and digital collections seamlessly. For family galleries, involve household members in curation decisions. Make updating my photo gallery a collaborative tradition—perhaps during holidays or family gatherings. This ensures the display represents multiple perspectives and strengthens emotional connections. Document your gallery's arrangement with photos before making changes. This preserves layout ideas you might want to revisit. Finally, consider the long-term preservation of your photographs. Use UV-protective glass for valuable images and keep digital backups of all displayed photos. A well-maintained gallery becomes a living archive that grows more valuable with time, capturing not just moments but the evolution of your story and space.
Conclusion
Creating and maintaining my photo gallery transforms how we interact with our memories and living spaces. This process goes beyond simple decoration—it's an act of storytelling that turns walls into narrative canvases and houses into homes filled with personal history. The techniques we've explored, from careful planning and quality materials to personal touches and ongoing evolution, empower you to build displays that honor your experiences while enhancing your daily environment. Your gallery becomes more than a collection of images; it's a dynamic reflection of your journey, values, and connections. As you continue developing my photo gallery, remember that perfection matters less than authenticity. The most compelling displays often include imperfect arrangements, mixed media elements, and evolving compositions that mirror life's organic nature. These galleries become conversation starters, mood enhancers, and personal landmarks in your home. Looking forward, consider how technology might integrate with traditional displays—perhaps through smart frames or augmented reality elements that add layers to your visual stories. But regardless of technological advances, the fundamental human desire to preserve and share memories through images remains constant. Start your gallery today, even if modestly, and watch how these curated memories transform not just your walls but your relationship with your space. Your photographs deserve this celebration, and your home deserves this personal touch that no store-bought art can replicate.
Frequently Asked Questions
Q: How do I choose the right wall for my photo gallery?
Select a wall with adequate space and visibility, preferably in a frequently used area like a living room, hallway, or staircase. Consider lighting conditions—walls receiving indirect natural light are ideal. Avoid direct sunlight which fades photos over time. Also consider the wall's function; a gallery above furniture should have proper proportions to the pieces below. For beginners, start with a smaller, manageable wall to build confidence before tackling larger spaces.
Q: What's the best way to arrange frames in my photo gallery?
Begin by laying frames on the floor to experiment with arrangements before hanging. Common approaches include grid patterns for uniformity, salon-style clusters for eclectic looks, or horizontal/vertical lines along architectural features. Maintain consistent spacing between frames (usually 2-3 inches) and keep the center of the arrangement at eye level (about 57 inches from floor). Mix frame sizes and orientations for visual interest while maintaining balance. Use paper templates to mark positions before making holes.
Q: How can I protect my photos from damage in my photo gallery?
Use UV-protective glass or acrylic to prevent fading from light exposure. Ensure frames have acid-free mats and backing to prevent chemical deterioration. Hang photos away from heat sources, humidity, and direct sunlight. For valuable photographs, consider professional framing with archival materials. Regularly dust frames and check for signs of moisture or insect damage. Keep digital backups of all displayed images, and consider rotating photos seasonally to minimize light exposure over time.