
Imagine walking into your home and being greeted by bursts of color that lift your spirits instantly. Painted flower pots offer more than just a container for your plants—they’re a creative outlet that brings personality and joy to any living space. Whether you’re a seasoned gardener or someone just starting to explore indoor greenery, customizing your planters can transform ordinary pots into extraordinary works of art. The beauty of painted flower pots lies in their versatility; they can match your decor, celebrate seasons, or simply express your unique style. This simple DIY project doesn’t require artistic expertise—just a willingness to experiment and have fun. As more people seek ways to personalize their homes, painted flower pots have become a popular trend that combines functionality with creative expression. They offer an affordable way to refresh your space without major renovations. Plus, they make wonderful gifts that show thoughtfulness and care. In this guide, we’ll explore everything from basic techniques to advanced designs, helping you create stunning painted flower pots that breathe new life into your home. Let’s discover how these colorful containers can become the highlight of your indoor or outdoor garden.
Essential Supplies for Painting Flower Pots
Before you begin your painted flower pots project, gathering the right materials is crucial for success. Start with clean terracotta, ceramic, or plastic pots—terracotta is particularly popular because it absorbs paint well and provides a natural texture. You'll need acrylic paints, which are water-based, durable, and available in countless colors. Invest in quality brushes: flat brushes for large areas, round brushes for details, and sponge brushes for smooth finishes. Primer creates a uniform surface, especially on porous pots, while sealant protects your design from moisture and fading. Don't forget painter's tape for clean lines and stencils if you prefer guided designs. Work in a well-ventilated area with newspaper or a drop cloth to protect surfaces. Many craft stores offer affordable kits with everything you need, but you can also repurpose household items like old mugs or containers. Remember that the right supplies make the process enjoyable and ensure your painted flower pots last through seasons. With these basics, you're ready to unleash your creativity and transform simple planters into personalized treasures.
Step-by-Step Techniques for Painted Flower Pots
Creating beautiful painted flower pots involves simple steps anyone can follow. First, clean your pots thoroughly with soap and water to remove dust and debris. Let them dry completely before applying a coat of primer; this helps paint adhere better and prevents colors from bleeding. Once primed, sketch your design lightly with a pencil or use stencils for precision. When painting, start with base colors and work in layers, allowing each to dry to avoid smudging. For gradient effects, blend wet paints with a damp brush. If you make mistakes, don't worry—acrylic paint is forgiving and can be painted over. After completing your design, let the paint cure for at least 24 hours. Then apply a clear sealant, preferably one labeled for outdoor use if pots will be outside. This protective layer shields your artwork from water and UV rays. For added texture, consider techniques like sponge painting or using masking tape for geometric patterns. Painted flower pots can feature anything from simple stripes to intricate floral motifs. The key is patience and experimentation. These techniques ensure your creations are both visually appealing and durable, ready to showcase your favorite plants.
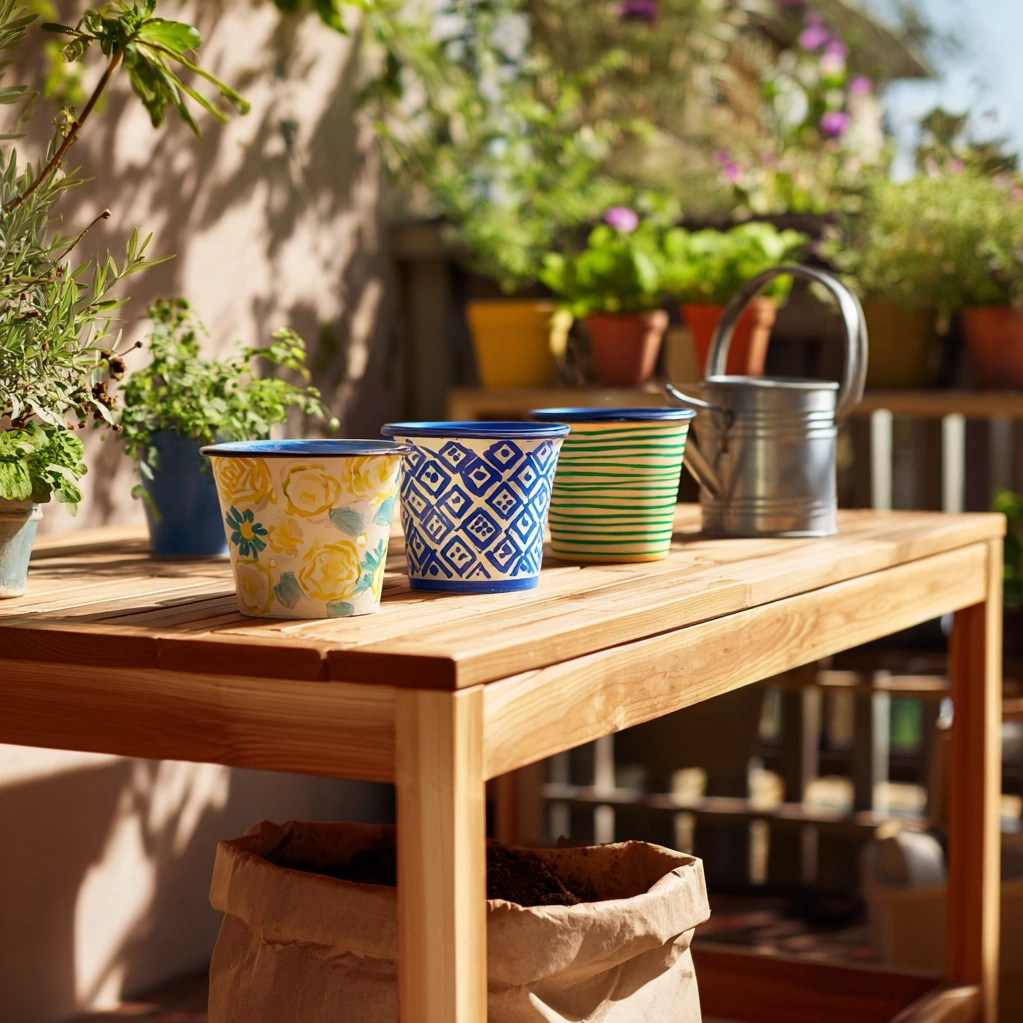
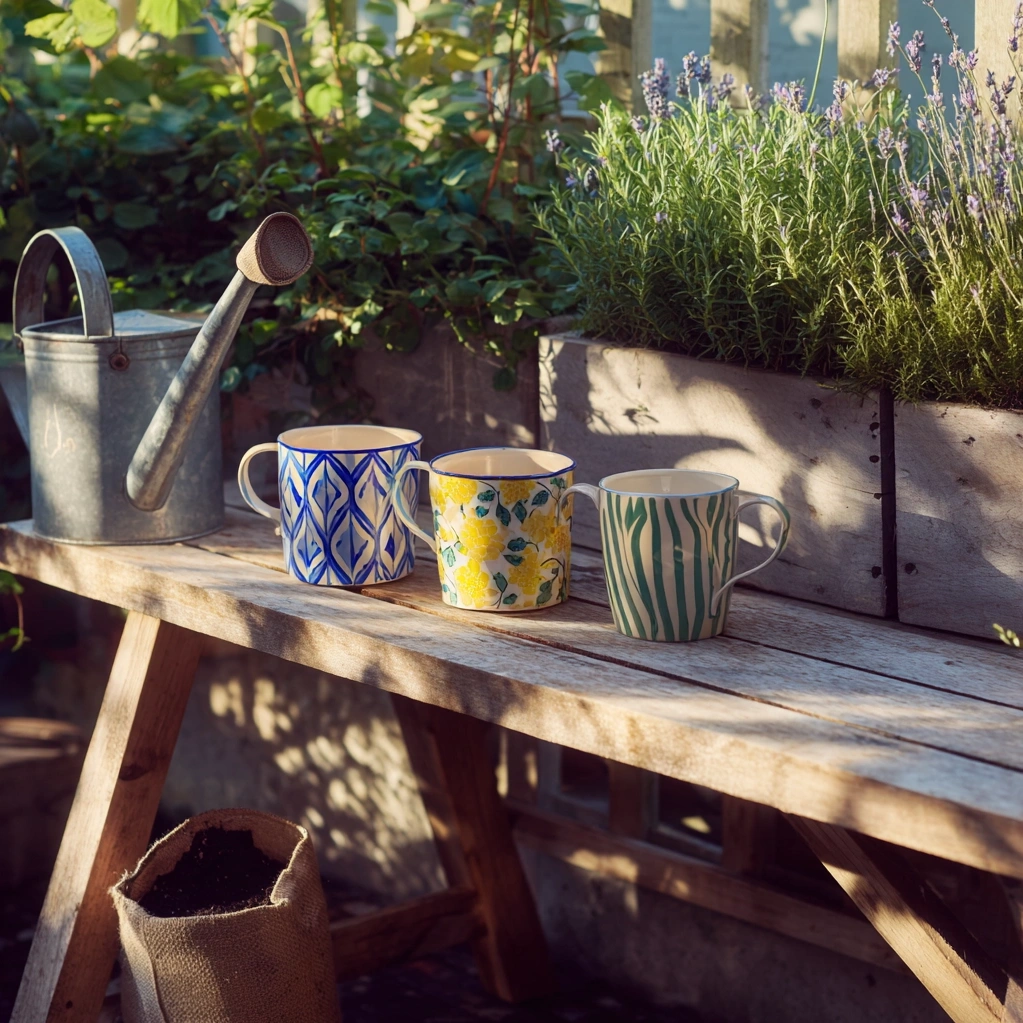
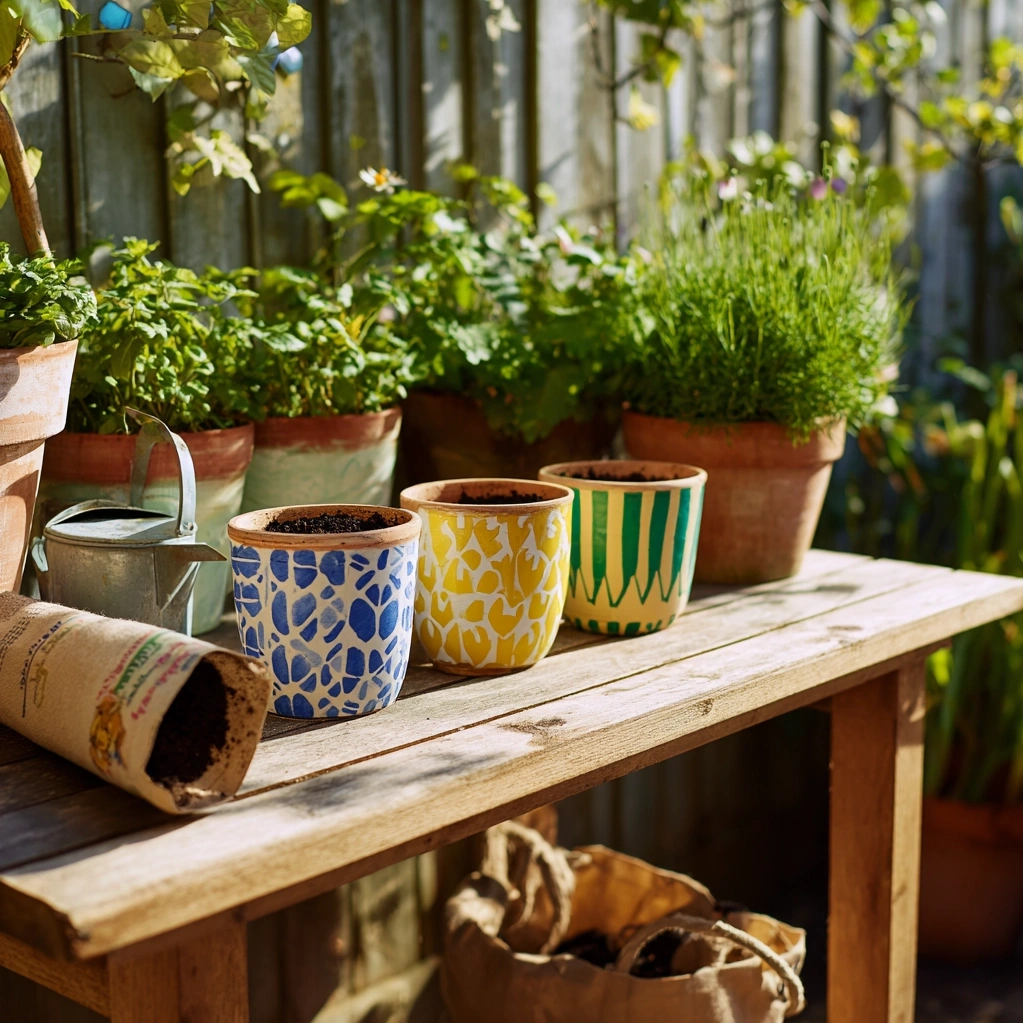
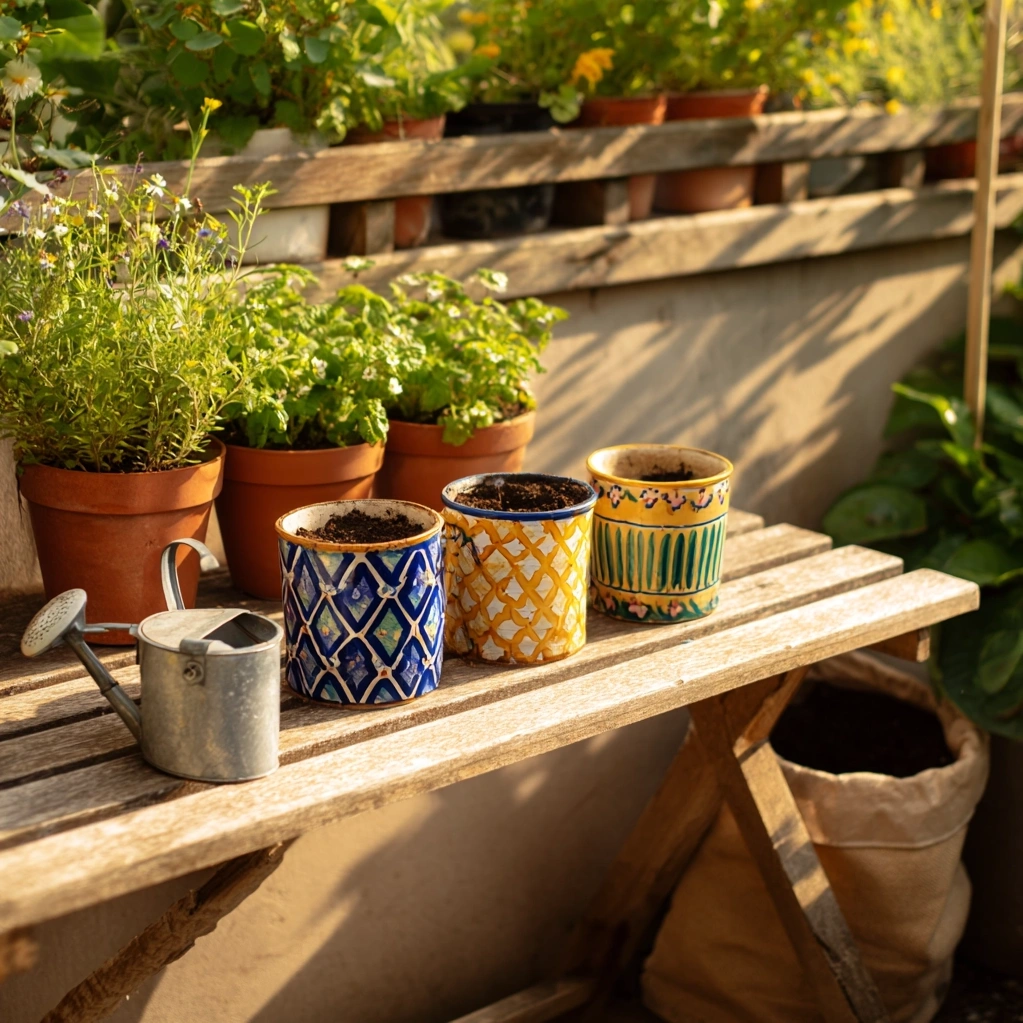
Creative Design Ideas for Painted Flower Pots
The possibilities for painted flower pots are endless, limited only by your imagination. For a modern look, try minimalist designs with neutral colors and clean lines. Geometric patterns using painter's tape create sharp, professional results. Nature-inspired themes, like watercolor flowers or leafy vines, blend seamlessly with garden settings. Seasonal designs—think pumpkins for fall or snowflakes for winter—keep your decor fresh year-round. Personalized pots with names or initials make heartfelt gifts. Consider color schemes that complement your home; muted tones for a serene vibe or bright hues for a playful touch. Mix and match patterns for an eclectic collection. For children's rooms, paint cheerful characters or animals. Upcycling old pots with chalk paint allows you to change designs easily. Another trend is ombre effects, where colors fade from dark to light. Stencils offer precision for complex images without freehand stress. Remember, painted flower pots don't need to be perfect; imperfections add charm. Display them in groups for visual impact, varying sizes and designs. These ideas help you create unique pieces that reflect your personality and enhance any space, indoors or out.
Caring for Your Painted Flower Pots
To ensure your painted flower pots remain vibrant and functional, proper care is essential. Start by choosing the right sealant; polyurethane or acrylic sealers provide waterproof protection, especially for outdoor use. Reapply sealant annually to maintain durability against weather elements. When watering plants, avoid soaking the painted surfaces excessively, as prolonged moisture can cause peeling. Use saucers beneath pots to catch drainage and protect surfaces. For cleaning, gently wipe with a damp cloth instead of harsh scrubbing. If cracks or chips appear, touch up with matching paint and reseal the area. Store painted flower pots indoors during extreme weather to prevent fading or damage. Rotate pots periodically to ensure even sun exposure if kept outside. When repotting plants, handle with care to avoid scratching the paint. These practices extend the life of your creations, keeping them looking fresh. Additionally, consider the plants you pair with painted pots; succulents and cacti require less water, reducing wear. With minimal upkeep, your painted flower pots can delight for years, becoming cherished elements of your home decor. Regular maintenance ensures they continue to bring color and joy to your space.
Conclusion
Painted flower pots offer a wonderful blend of creativity and practicality, allowing you to personalize your living spaces with ease. Throughout this article, we've explored essential supplies, step-by-step techniques, design ideas, and care tips to help you succeed in your DIY projects. These colorful containers do more than hold plants—they express your style, brighten rooms, and make meaningful gifts. As you experiment with different patterns and colors, remember that the process itself is rewarding; each brushstroke adds character to your home. Looking ahead, consider expanding your skills by trying new materials like metallic paints or textured finishes. Share your creations with friends or on social media to inspire others. The future of home decor continues to embrace handmade touches, and painted flower pots are a perfect example of how simple projects can have a big impact. Whether you're refreshing a single pot or creating a whole collection, the joy of seeing your designs come to life is undeniable. Start small, have fun, and watch as your painted flower pots transform ordinary spaces into extraordinary sanctuaries of color and life.
Frequently Asked Questions
Q: What type of paint is best for painted flower pots?
Acrylic paint is ideal for painted flower pots because it's water-based, durable, and available in many colors. It adheres well to surfaces like terracotta, ceramic, and plastic. For outdoor pots, use outdoor-rated acrylics or seal with a waterproof sealer to prevent fading and peeling. Avoid oil-based paints as they can take longer to dry and may not breathe well for plants.
Q: How do I prepare pots before painting?
Clean pots thoroughly with soap and water to remove dirt and oils. Let them dry completely. Apply a primer to create a smooth base, especially on porous materials like terracotta. This helps paint stick better and ensures colors appear vibrant. Lightly sand rough surfaces if needed, but avoid over-sanding. Proper preparation prevents peeling and ensures long-lasting results for your painted flower pots.
Q: Can painted flower pots be used outdoors?
Yes, painted flower pots can be used outdoors if properly sealed. After painting, apply a clear, waterproof sealant designed for exterior use. This protects against rain, sun, and temperature changes. Reapply sealant yearly to maintain protection. Choose durable paints and avoid placing pots in direct, harsh sunlight for extended periods to minimize fading. With care, outdoor painted flower pots add color to gardens and patios.