
Imagine stepping into your garden or onto your balcony and being greeted by a vibrant array of hand-painted flower pots, each one a unique expression of your personal style. Painting flower pots isn’t just a craft—it’s a transformative activity that breathes new life into your outdoor and indoor spaces. Whether you’re a seasoned DIY enthusiast or a complete beginner, this simple yet powerful creative outlet offers countless benefits that extend far beyond mere decoration. In our increasingly digital world, the tactile pleasure of painting terra cotta, ceramic, or plastic pots provides a refreshing break from screens while allowing you to connect with nature in a meaningful way. The importance of this topic lies in its accessibility and impact. Unlike complex home renovation projects, painting flower pots requires minimal investment but delivers maximum visual reward. You don’t need artistic training or expensive supplies—just some basic materials and a willingness to experiment. This activity serves as the perfect gateway to personalizing your living environment, whether you’re refreshing old pots from last season or starting fresh with new ones. Beyond aesthetics, painted pots create focal points in your garden, define spaces on patios, and add personality to windowsills. They transform ordinary containers into conversation pieces that reflect your creativity and care. This article will guide you through everything from choosing materials to mastering techniques, ensuring your painted flower pots become cherished additions to your home that last for seasons to come.

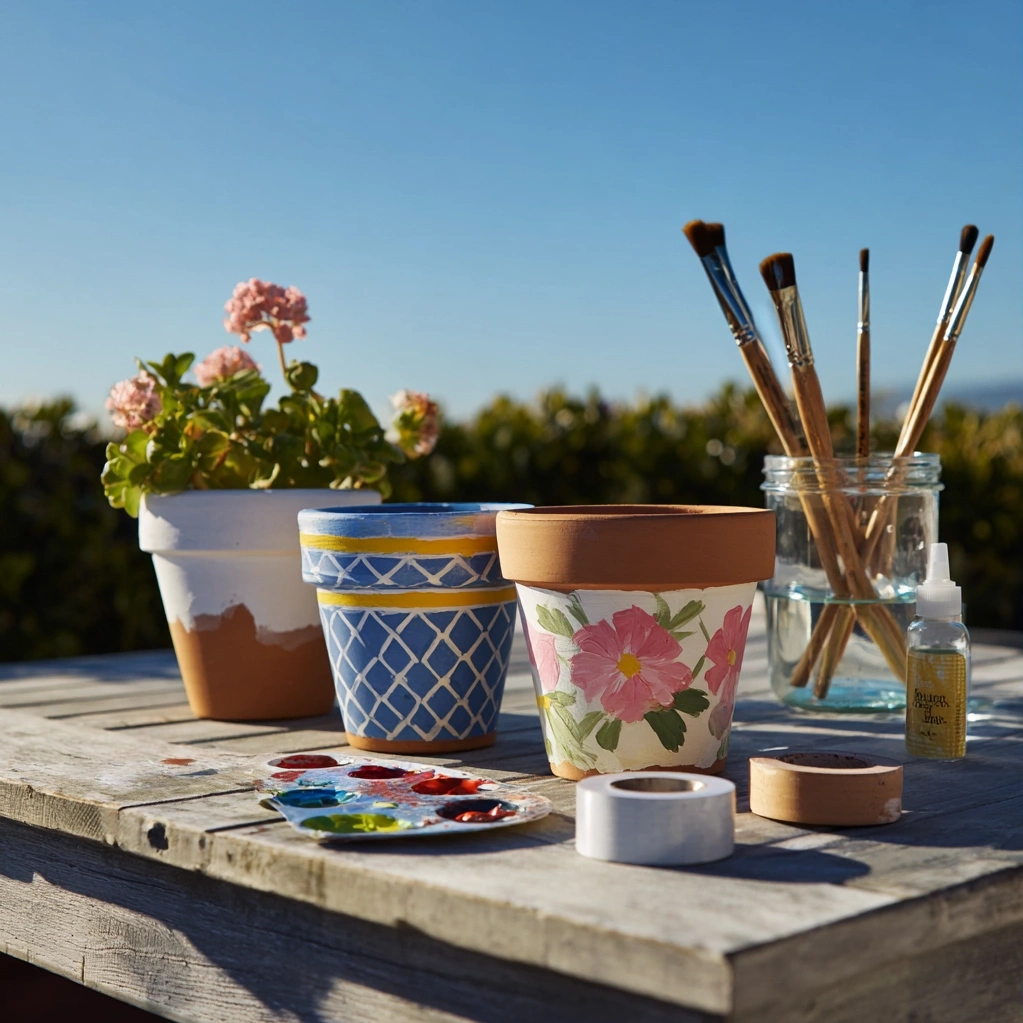
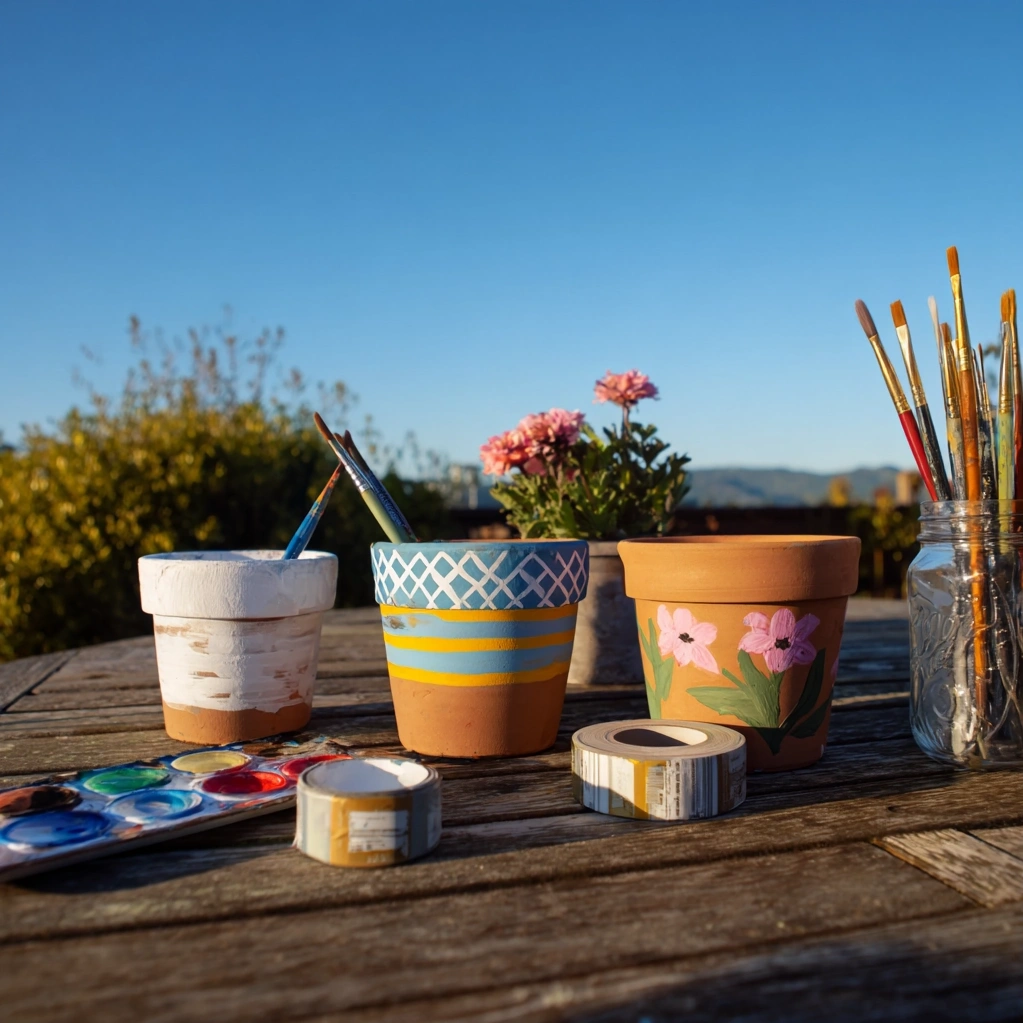
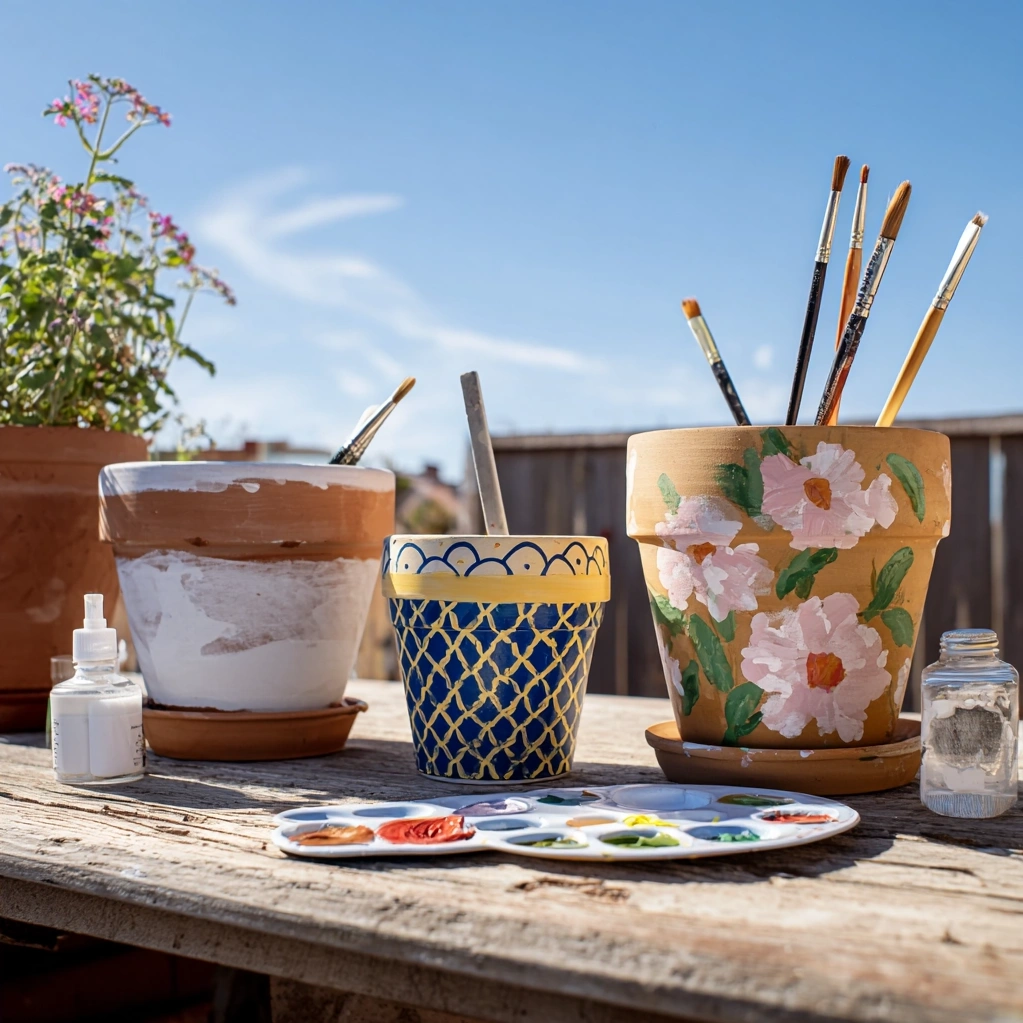
Essential Materials and Tools for Painting Flower Pots
Before you begin your flower pot painting adventure, gathering the right materials will set you up for success. The foundation of any good project starts with the pots themselves. Terra cotta pots are a classic choice—their porous surface accepts paint beautifully and develops a charming patina over time. Ceramic pots offer a smoother finish for detailed designs, while plastic pots provide lightweight durability perfect for beginners. For painting, acrylic paints are your best friend. They're water-based, quick-drying, and available in every color imaginable. Look for outdoor or multi-surface acrylics that withstand weather conditions if your pots will live outside. You'll need various brush sizes: flat brushes for broad coverage, round brushes for details, and perhaps some sponge brushes for textured effects. Don't forget primer—this crucial step ensures paint adheres properly and lasts longer. A clear sealant is equally important for protecting your masterpiece from moisture and UV damage. Other essentials include painter's tape for clean lines, sandpaper for smoothing surfaces, and drop cloths to protect your workspace. Consider adding specialty products like chalk paint for a matte finish or metallic paints for accent details. Having all materials organized before you start prevents interruptions and lets you focus on creativity. Remember that quality doesn't always mean expensive—many successful projects use basic craft store supplies. The key is choosing materials appropriate for your pot material and intended location.
Step-by-Step Techniques for Painting Flower Pots Beautifully
Mastering fundamental techniques will elevate your painted flower pots from amateur attempts to professional-looking creations. Start with proper preparation: clean your pots thoroughly to remove dust and debris, then lightly sand any rough areas. Apply primer evenly and let it dry completely—this creates the perfect canvas for your design. For solid colors, use smooth, overlapping brush strokes in one direction, applying multiple thin coats rather than one thick layer. This prevents drips and ensures even coverage. When creating patterns, painter's tape is your best ally. Apply it firmly to create crisp geometric designs like stripes or chevrons. For organic patterns like floral motifs, sketch lightly with pencil first, then paint within your guidelines. The dry brushing technique adds wonderful texture—dip your brush in paint, wipe most off on paper towel, then lightly drag across the pot's surface. This works beautifully for creating weathered or rustic effects. Stenciling offers another accessible option for intricate designs without freehand pressure. Secure your stencil with tape, dab paint with a stencil brush using minimal paint to prevent bleeding, then carefully remove to reveal clean patterns. Don't overlook the inside rim of pots—painting this area creates a finished look visible from above. For multi-color designs, work from lightest to darkest colors and allow proper drying time between layers. Experiment with different tools beyond brushes: sponges create mottled effects, toothbrushes can spatter paint for a starry night look, and even household items like bubble wrap produce interesting textures. The most important technique is patience—allow each layer to dry completely before adding the next.
Creative Design Ideas for Painting Flower Pots
Unleash your creativity with these inspiring design ideas for painting flower pots that will make your garden truly unique. For a cohesive look, consider color themes that complement your home's exterior or garden palette. Soft pastels create a serene cottage garden feel, while bold primaries make vibrant statements in modern spaces. Ombré effects, where colors gradually blend from dark to light, are surprisingly simple to achieve with sponge blending and always impress. Nature-inspired designs never go out of style—paint delicate ferns, trailing ivy, or blooming roses that echo the plants your pots will contain. For contemporary aesthetics, geometric patterns like triangles, diamonds, or Moroccan tiles add graphic interest. Personalization transforms pots into meaningful pieces: paint family initials, meaningful dates, or inspirational words in elegant script. Seasonal themes allow you to rotate displays throughout the year—think sunflowers for summer, pumpkins for autumn, snowflakes for winter, and daffodils for spring. Don't underestimate the power of simple techniques: dipping pots partially in paint creates modern two-tone effects, while masking off sections with tape produces clean color blocks. For children's gardens or playful spaces, paint friendly insects like ladybugs and bees, or create animal faces that make pots resemble creatures. Texture plays a crucial role in design—consider adding dimensional elements with textured paints or attaching small stones or seashells before sealing. Theme entire sets of pots for visual impact: paint a gradient across multiple pots, repeat a pattern in different colorways, or create a story across pots of varying sizes. The most successful designs often balance artistic elements with the pot's functional purpose, ensuring decorations enhance rather than overwhelm the plants they contain.
Maintenance and Display Tips for Painted Flower Pots
Proper care ensures your beautifully painted flower pots remain vibrant for years while creative display maximizes their impact in your space. Maintenance begins with the right sealant—choose one specifically formulated for outdoor use if pots will face the elements. Apply two to three thin, even coats, allowing proper drying time between applications. This protective layer prevents fading from sunlight and damage from moisture. When cleaning painted pots, avoid harsh chemicals or abrasive scrubbers that could strip the sealant or paint. Instead, use mild soap and water with a soft cloth, rinsing thoroughly. For seasonal storage, keep pots in a dry, temperature-controlled area to prevent cracking or paint deterioration. Display considerations dramatically affect how your painted flower pots enhance your environment. Group pots in odd numbers (three, five, or seven) for visually pleasing arrangements. Vary heights using pot feet, overturned pots as pedestals, or staggered shelving to create dynamic levels. Consider the visual weight of your designs—busy patterns often work best as standalone statements, while simpler designs can be clustered effectively. Pay attention to sight lines: place taller painted pots at the back of displays and smaller ones in front. For indoor displays, painted pots add color to windowsills, brighten kitchen herb gardens, or create centerpieces when grouped on trays. Outdoor arrangements benefit from considering sunlight—lighter colors reflect heat in sunny spots, while darker colors absorb warmth in shadier areas. Rotate pots seasonally to prevent uneven sun exposure that could fade specific areas. When planting, ensure proper drainage to prevent water damage to painted surfaces from inside the pot. Elevate pots slightly with feet or stones to improve airflow and prevent moisture buildup beneath. With proper maintenance and thoughtful display, your painted flower pots become lasting elements of your home's personality rather than temporary decorations.
Conclusion
Painting flower pots represents one of the most accessible and rewarding forms of home personalization available today. Throughout this guide, we've explored how this simple activity combines creative expression with practical gardening, transforming ordinary containers into extraordinary elements of your living space. The journey from selecting materials to applying final sealant offers numerous opportunities for customization, allowing each painted pot to reflect your unique style and vision. Beyond the immediate satisfaction of creating something beautiful with your own hands, these painted treasures serve as constant reminders of your creativity every time you step into your garden or glance at your windowsill. They bridge the gap between indoor comfort and outdoor beauty, bringing artistic touches to natural spaces. As you continue your flower pot painting journey, remember that perfection isn't the goal—each brushstroke tells a story, and even 'imperfections' add character that mass-produced items can never replicate. The future of this craft looks bright, with new paint formulations and techniques constantly emerging. Consider expanding your skills by experimenting with different surfaces beyond traditional pots, or teaching friends and family to create their own designs. Most importantly, let your painted flower pots evolve with your tastes and seasons, repainting and refreshing them as inspiration strikes. This sustainable approach to decor keeps your spaces feeling fresh without constant consumption. Whether you create one special pot or an entire garden's worth, the act of painting flower pots plants seeds of creativity that continue blooming long after the paint has dried.
Frequently Asked Questions
Q: What type of paint works best for outdoor flower pots?
For outdoor flower pots, acrylic paint designed for multi-surface or outdoor use is ideal. These paints contain additives that resist fading from UV exposure and withstand weather conditions. Always finish outdoor pots with 2-3 coats of clear exterior sealant for maximum protection. Avoid regular indoor craft paints for outdoor use as they may peel or fade quickly.
Q: How do I prepare terra cotta pots before painting?
Proper preparation ensures paint adheres well to terra cotta pots. First, clean pots thoroughly with warm water and mild soap to remove dust and residues. Let them dry completely. Lightly sand the surface with fine-grit sandpaper to create better adhesion points. Apply a primer specifically designed for porous surfaces—this seals the terra cotta and prevents paint from being absorbed unevenly. Allow primer to dry completely before painting.
Q: Can I paint plastic flower pots, and will the paint last?
Yes, you can successfully paint plastic flower pots with proper preparation. Clean plastic pots with soap and water, then lightly sand the surface to create texture for paint adhesion. Use a primer formulated for plastic surfaces. Acrylic paints work well, but for longest durability, consider spray paints specifically designed for plastic. Apply multiple thin coats rather than one thick layer, and finish with a clear sealant for protection.